
Articles in this section
- How to Create an Archicad Template and What It Should Contain?
- How to Reallocate Bluebeam Subscriptions Between Accounts?
- How to Subscribe to Software with SIMBIM
- Archicad Files Don't Show the Correct Icon on Windows
- Why Can't I Assign a Licence If the User Shows Up as a Guest?
- How to Reset Your Bluebeam ID (BBID) Password?
- How to Transfer Markups to Another Document?
- How to Manage My Bluebeam Subscriptions?
- How to Change the Administrator of a Graphisoft ID Company?
- How to Use Bluebeam Revu on Mac Computers?
How to Manage My Bluebeam Subscriptions?
The Bluebeam Subscription Administration Portal (Org Admin Portal) allows administrators to manage users, permissions and licences for active Bluebeam subscriptions. From this platform, you can add or remove users, configure preferred languages, reallocate subscriptions and keep the role and product structure up to date.
The Bluebeam Plans (Basics, Core and Complete) provide access to Revu 21, Studio and Bluebeam Cloud on up to three devices with a single sign-on (BBID).
Accessing the Administration Portal
-
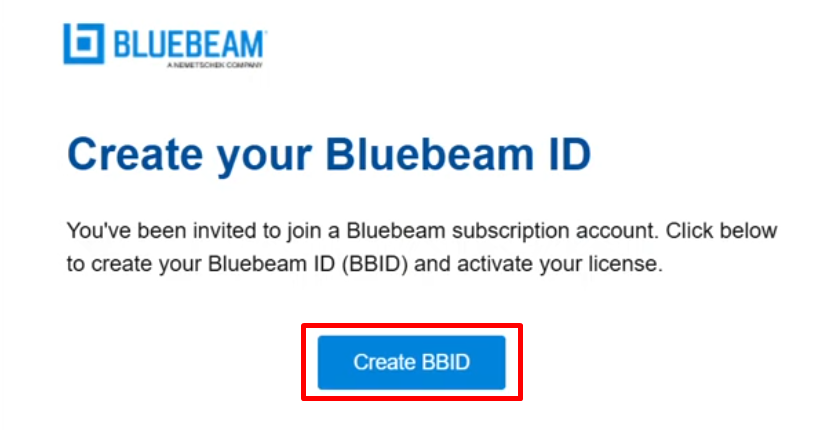
If you are a new administrator, use the link in the invitation email to complete initial registration.
- Open the portal: https://org-admin.bluebeam.com.
- Select the corresponding server region (Germany).
- Sign in with your Bluebeam ID (BBID) and password.
Note: If you have trouble accessing the portal, check that you have selected Germany as the server region.
Adding a New User
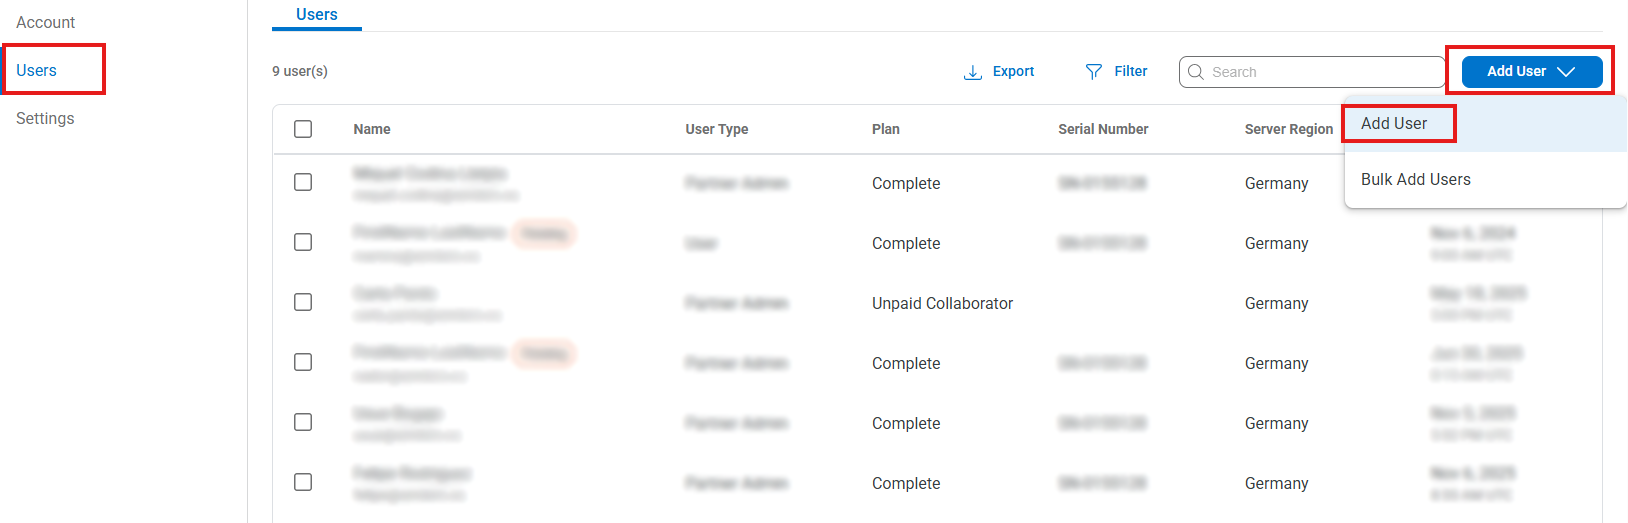
- Go to the side menu and select Users.
-
Click Add User.
- Enter the new user's first name, last name and email address.
- Select the server region (Germany) and set their permissions (Org Admin or User).
- Click Save and then assign the subscription plan (Basics, Core or Complete).
Note: The new user will receive an invitation email and will appear with Pending status until they accept.
Adding Users in Bulk
- In Users, click Add Users → Bulk Add.
- Download the CSV template and fill it in with the users' details.
- Upload the CSV file and click Validate CSV.
- If the file is valid, select Import All.
- The users will appear in the list with Pending status until they accept their invitations.
Editing User Permissions
- In the Users section, find the user you want to modify.
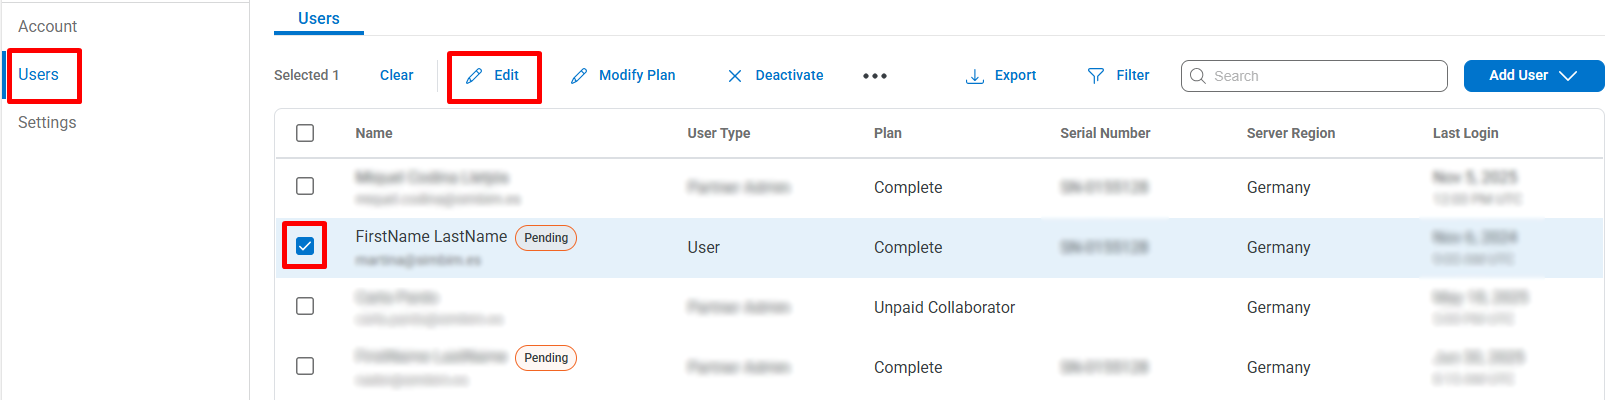
- Tick the checkbox to the left of the user(s) you want to modify.
-
Click Edit in the action bar.
- Adjust the permissions/role (for example, Org Admin / User).
- Click Save to apply the changes.
Tip: Keep the number of administrators limited to the people responsible for managing licences and users.
Editing Subscription Access for One or Multiple Users
Go to the Users tab.
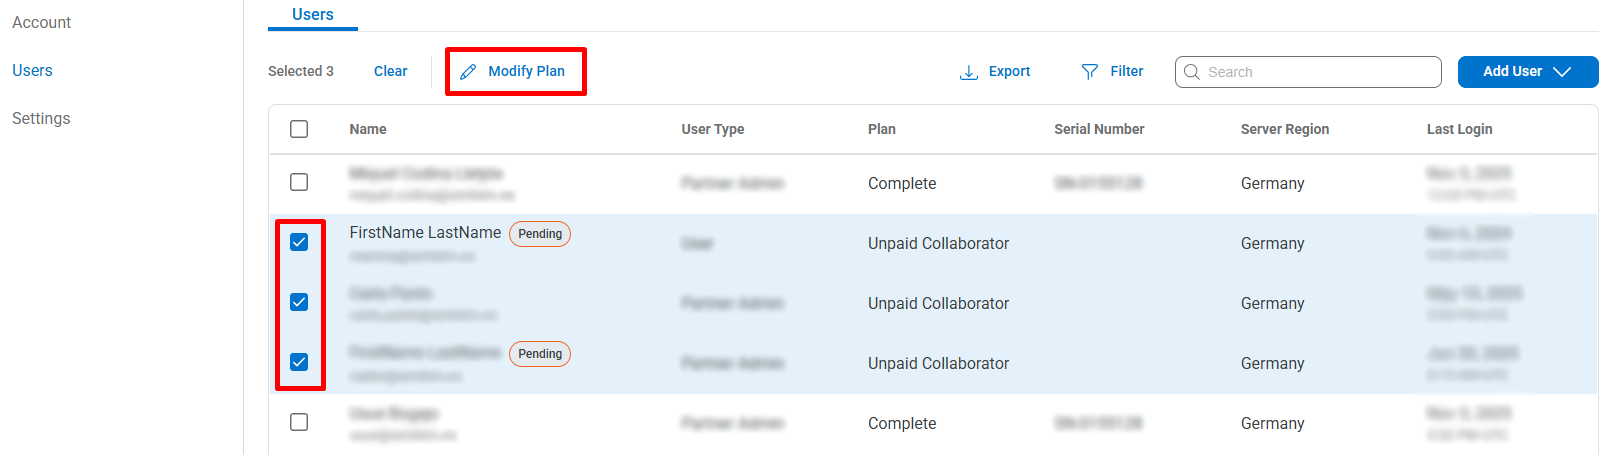
Tick the checkbox next to the user or users whose subscription plans you want to modify.
-
Click Modify Plan in the top action bar.
Select the new subscription plan (Basics, Core or Complete).
-
Click Save to apply the changes.
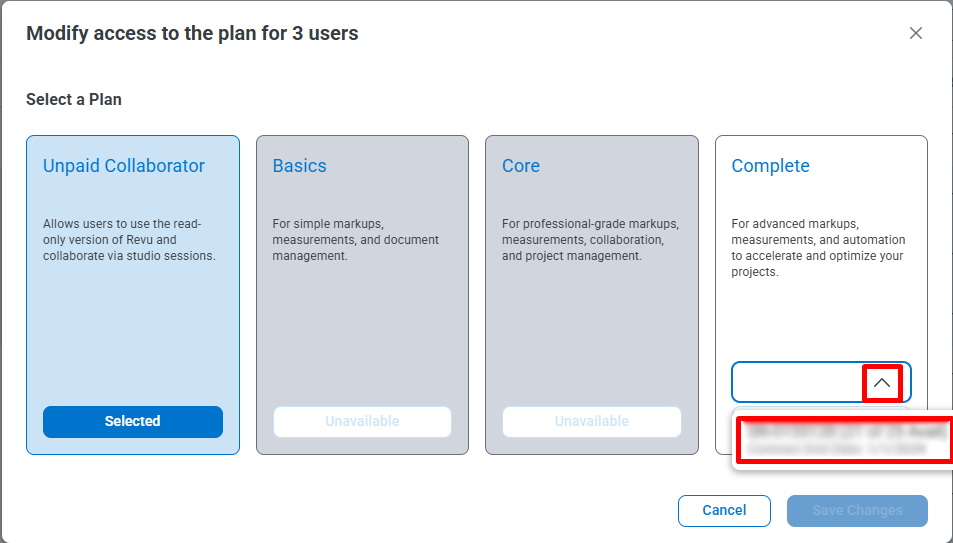
Note: To free up licences, assign the Unpaid Collaborator plan.
Filtering and Searching for Users
In the Users tab, use the search bar at the top to find specific users by typing their name or email address.
-
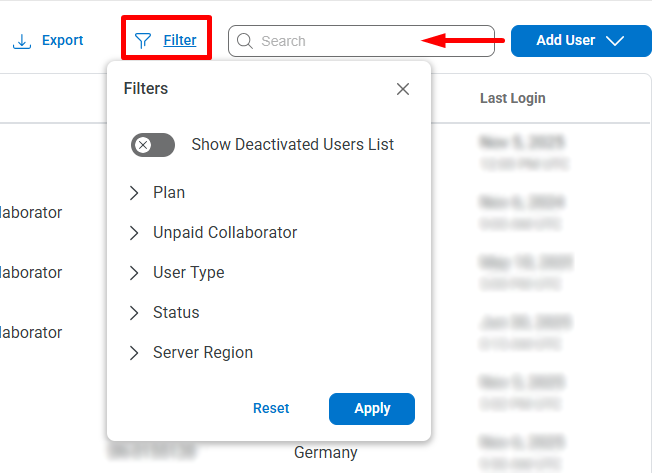
You can also click the Filters icon in the top-right corner of the list to open the filters menu.
-
In this menu you can choose from the following options:
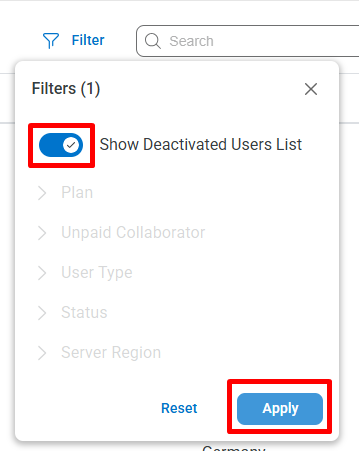
Show Deactivated Users List: turns the view of inactive users on or off.
Plan: filters by the assigned plan type (Basics, Core or Complete).
Unpaid Collaborator: shows invited users without an active subscription.
User type: filters by user type (Org Admin, User).
Status: shows users according to their status (Active, Pending).
Server region: filters by server region.
Once you have selected the filters you want, click Apply to apply them.
To return to the general view, select Reset.
Tip: You can combine the name or email search with the filters to quickly find specific users, such as those with pending invitations or collaborators without an active subscription.
Exporting the User List
- In the Users tab, click Export.
- Download the generated file with all users, their roles and statuses.
- Use this file for audits or reviews of active licences.
Resending an Invitation
Go to the Users tab.
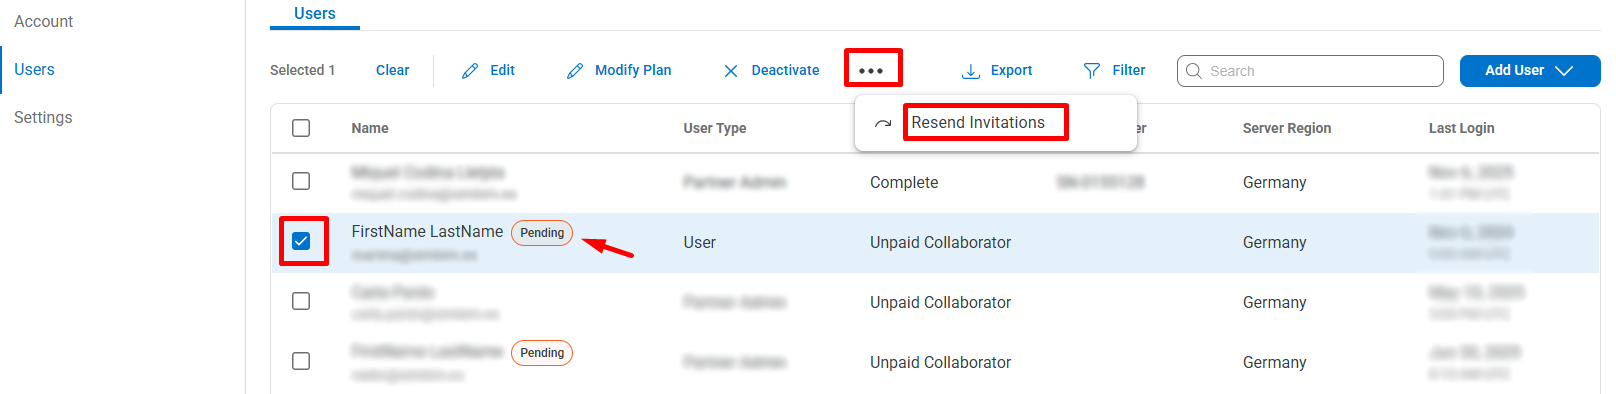
Tick the checkbox next to the user with Pending status.
In the top bar, click the three-dot icon (⋯) and select Resend Invitation.
-
Click Resend to send the invitation email again.
Tip: If the email doesn't arrive, check the address or ask the user to check their spam folder.
Deactivating a User
Go to the Users tab.
Tick the checkbox next to the user you want to deactivate.
In the top bar, click Deactivate.
-
Confirm by clicking Deactivate.
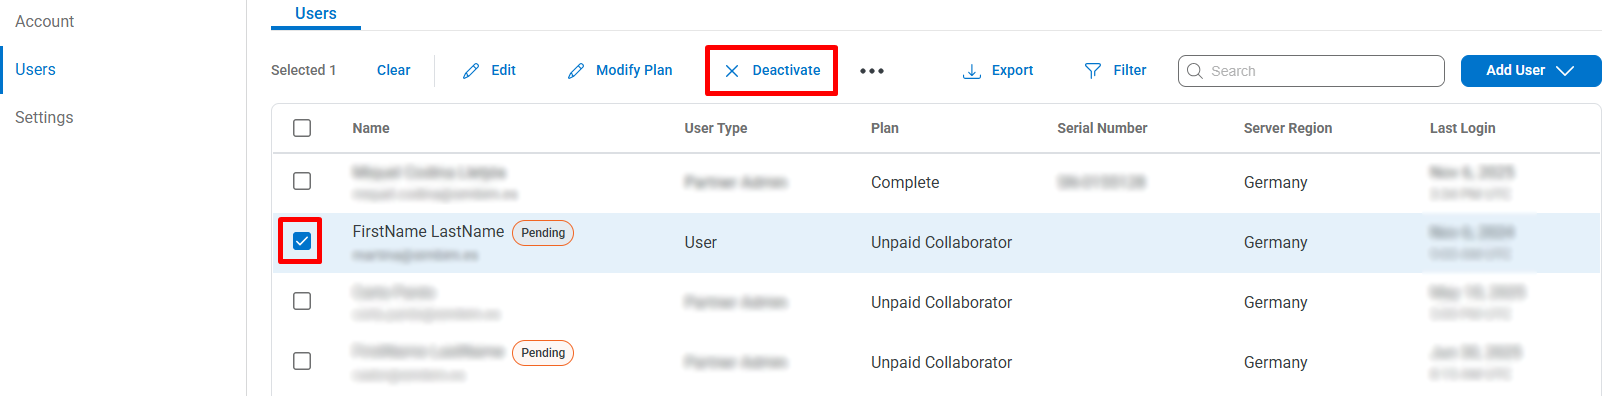
Note: The user will move to Inactive status and will lose access to the subscription plan until they are reactivated.
Reactivating a User
Go to the Users tab.
-
Click the Filters menu and turn on the Show Deactivated Users List option.
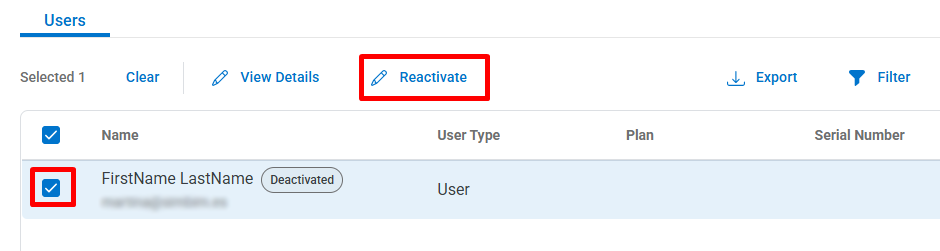
Tick the checkbox next to the user you want to reactivate.
-
In the top bar, click Reactivate.
Reallocating or Redistributing Subscriptions
Go to the Account section.
Open the Subscriptions tab.
Select the plan you want to modify and click Reallocate Subscriptions.
Specify how many licences to reallocate between users or teams and confirm.
Tip: Use this option when you reorganise teams or redistribute licences between departments.