
Articles in this section
- How to Create an Archicad Template and What It Should Contain?
- How to Reallocate Bluebeam Subscriptions Between Accounts?
- How to Subscribe to Software with SIMBIM
- Archicad Files Don't Show the Correct Icon on Windows
- Why Can't I Assign a Licence If the User Shows Up as a Guest?
- How to Reset Your Bluebeam ID (BBID) Password?
- How to Transfer Markups to Another Document?
- How to Manage My Bluebeam Subscriptions?
- How to Change the Administrator of a Graphisoft ID Company?
- How to Use Bluebeam Revu on Mac Computers?
How Can I Create a Custom Object in Archicad with Construction Elements? Example: Creating an Inspection Chamber
Reading time: 7 min.
In the BIM workflow, customisation is key to adapting to the specific needs of each project. Archicad makes it possible to create custom library objects easily, without requiring advanced programming knowledge. This article shows how to create a custom inspection chamber using the native tools in Archicad.
What is a custom library object?
A library object in Archicad is a reusable parametric element that can include 2D/3D geometry, properties, materials and interactive behaviours. Creating your own objects lets you standardise construction elements, improve documentation and optimise modelling.
Step by step: Creating a custom inspection chamber
-
Modelling the 3D geometry: First, model the inspection chamber by following these steps:
- Open a new project file in a new instance of Archicad,
- Check that the object’s required attributes are present in the project file.
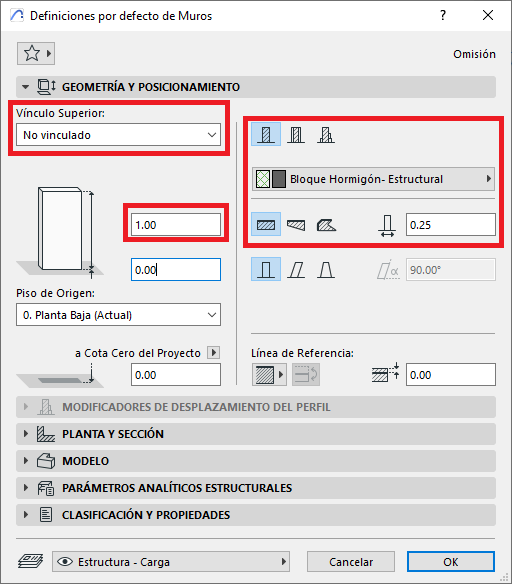
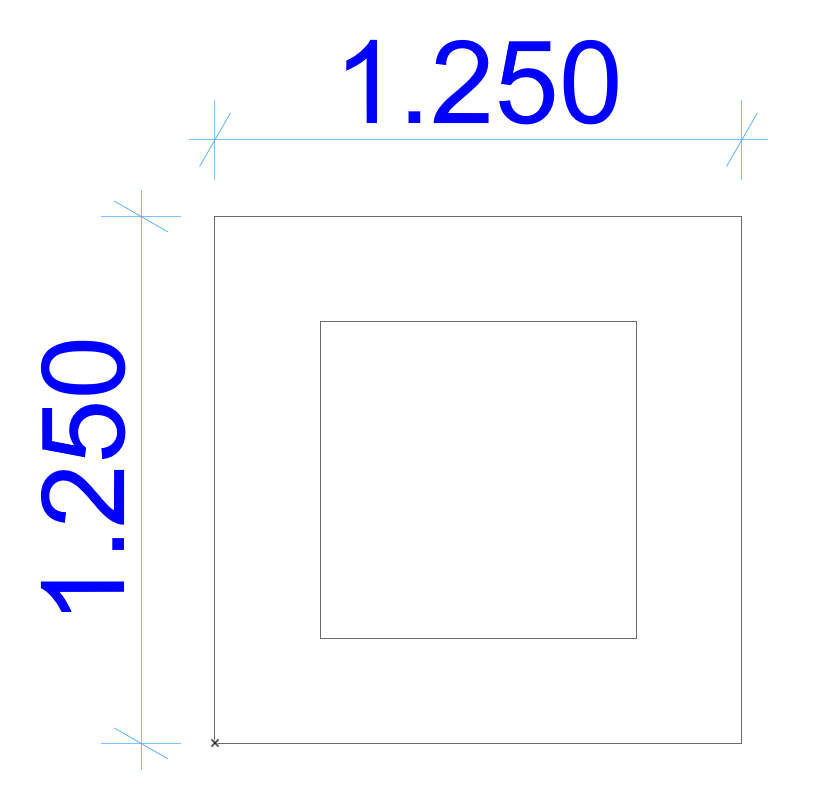
- Using the Wall tool, draw the inspection chamber’s walls as close as possible to the file’s origin (see photos; the dimensions shown are indicative only for this example — do not draw them on your object).
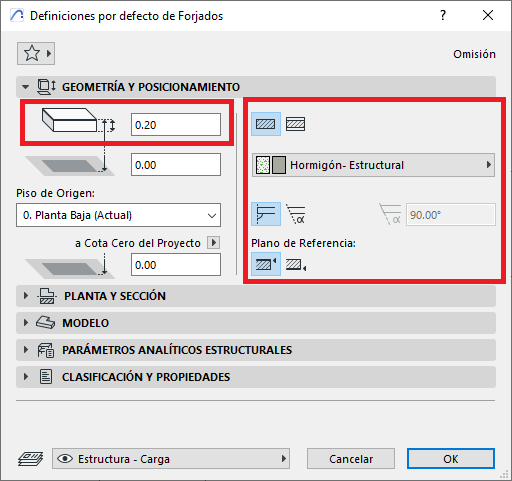
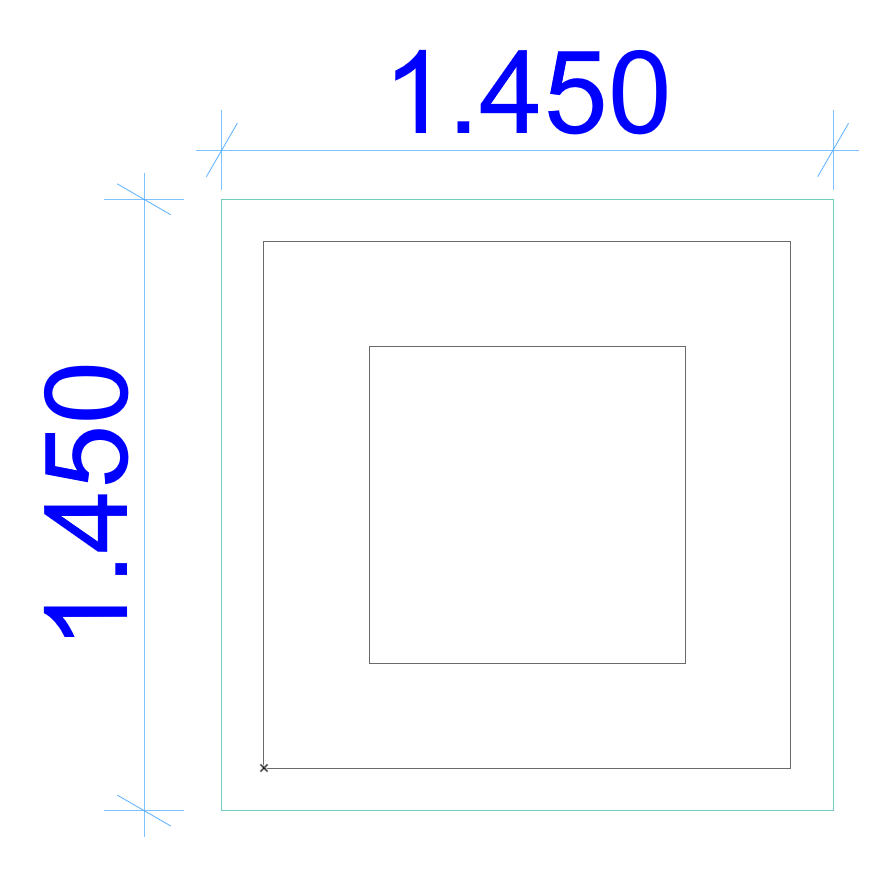
- Using the Slab tool, draw the inspection chamber’s slab/base (see photos; the dimensions shown are indicative only for this example — do not draw them on your object).
- Using the Window tool, select the Circular opening for the pipe inlets/outlets.
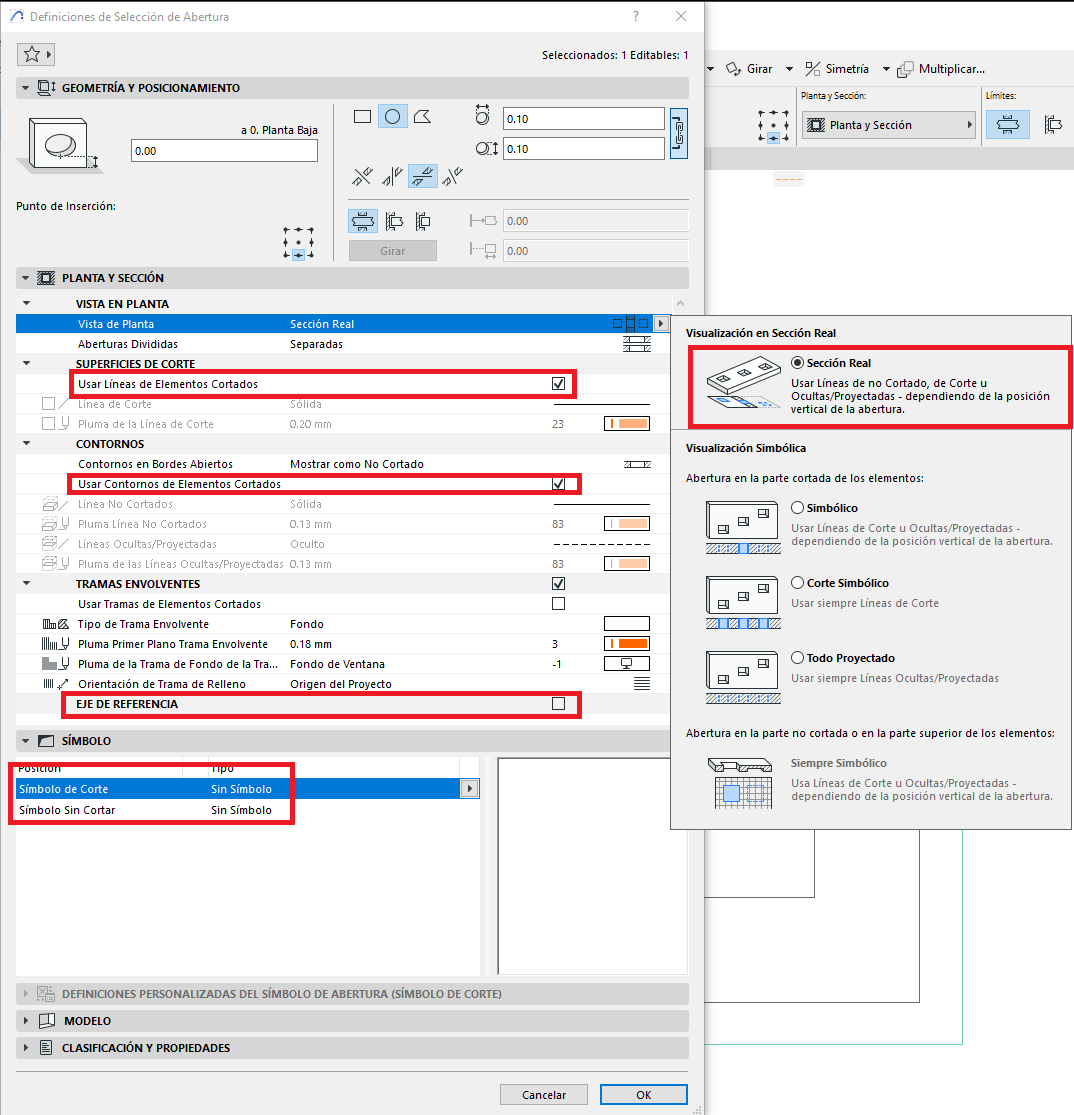
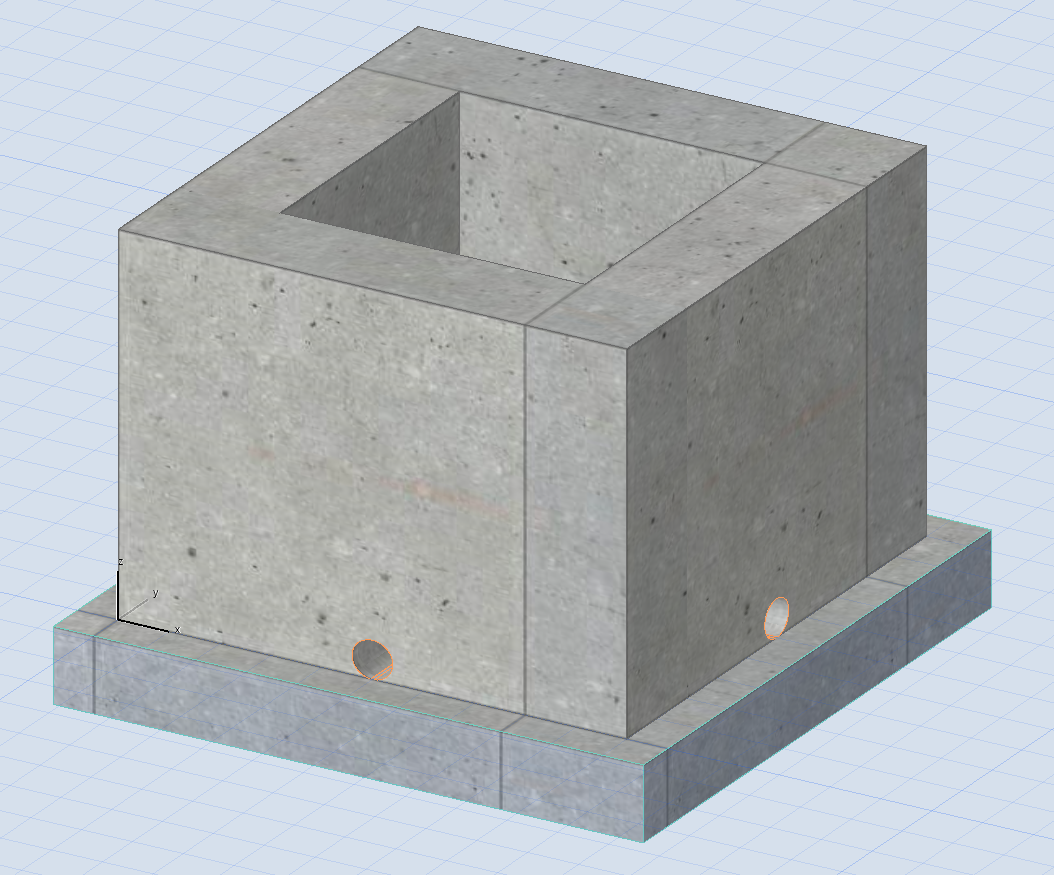
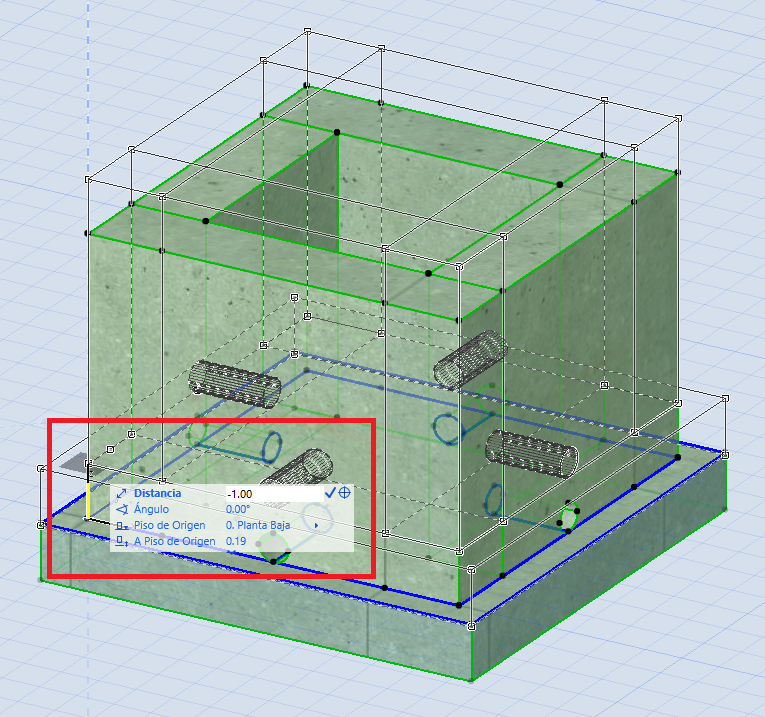
- Optional: adjust the vertical position of the elements.
-
Saving as a library object
Once the inspection chamber has been modelled:- Select all the elements of the model only.
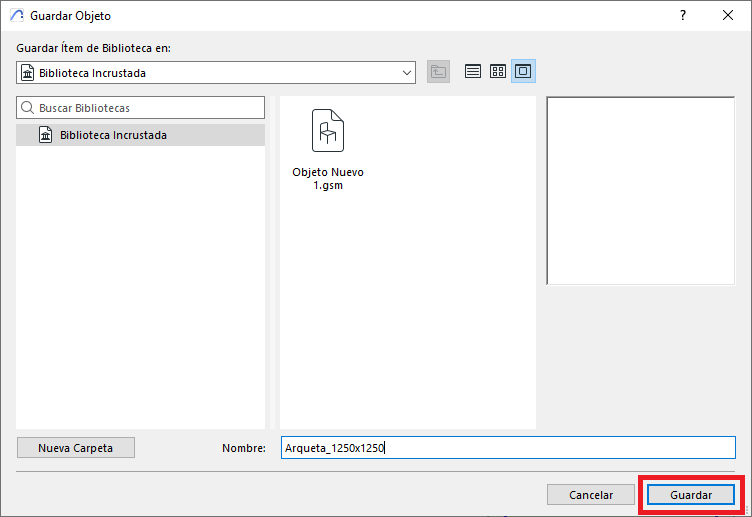
- Go to File > Libraries and Objects > Save Selection as > Object.
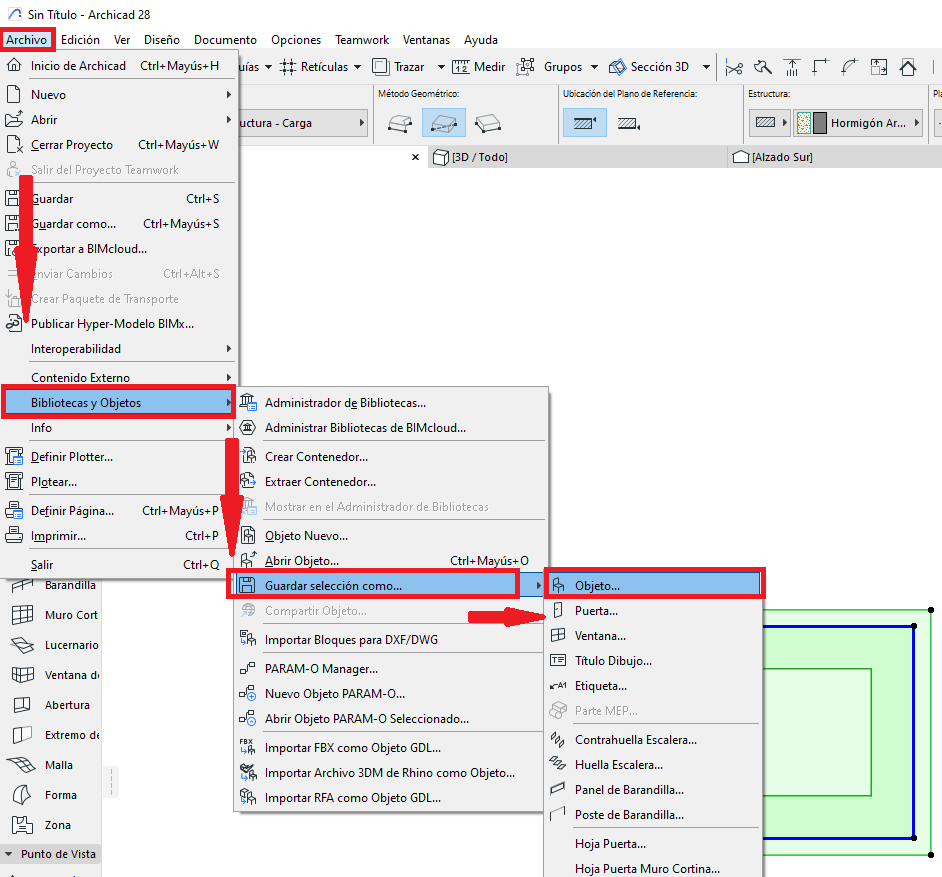
- Assign a descriptive name, for example: Arqueta_1250x1250, select a location, and click Save
-
Testing and reuse
Place the new object in your project and test its parameters. You can:- Insert it at different locations.
- Save it to a shared library for use in other projects.
Best-practice tips
To keep your workflow clean and efficient, bear these recommendations in mind:
- Keep the original Archicad project file: This way you can make changes to the object without having to start again.
- Standardised naming: Use a clear, consistent naming system, for example: ARQ_600x600_TapaRejilla. This makes objects easier to find and reuse.
- Use of dedicated layers: Assign the object’s elements to dedicated layers such as Custom Objects or Infrastructure, to make them easier to control in views and documentation.
- Internal documentation: Include a brief description of the object in its settings so other team members understand how to use it.
Common mistakes and how to avoid them
| Common mistake | How to avoid it |
|---|---|
| Model not aligned to the origin | Place the model as close as possible to the origin (0,0,0) to make it easier to position accurately in the project. |
| Not assigning dedicated layers | Use dedicated layers such as "Custom Objects" to make visibility control and documentation easier. |
| Saving to a library that is not loaded | Check that you are saving the object to an active library in the project, to avoid loading errors. |
Additional resource
For a visual demonstration of the process, we recommend this YouTube video:
Conclusion
Creating custom objects such as inspection chambers in Archicad not only improves modelling efficiency, but also makes it possible to standardise construction elements and simplify documentation. With just a few steps, you can turn any geometry into a reusable parametric object.