
Articles in this section
- How to Create an Archicad Template and What It Should Contain?
- How to Reallocate Bluebeam Subscriptions Between Accounts?
- How to Subscribe to Software with SIMBIM
- Archicad Files Don't Show the Correct Icon on Windows
- Why Can't I Assign a Licence If the User Shows Up as a Guest?
- How to Reset Your Bluebeam ID (BBID) Password?
- How to Transfer Markups to Another Document?
- How to Manage My Bluebeam Subscriptions?
- How to Change the Administrator of a Graphisoft ID Company?
- How to Use Bluebeam Revu on Mac Computers?
How to Install Archicad on a Windows Computer?
Reading time: 2 min.
To install Archicad on your Windows computer, follow these steps:
Step 1: Download the Installer
- Visit the official Graphisoft website and download the Archicad installer (Downloads – Graphisoft Spain).
-
Make sure to select the correct language and operating system.
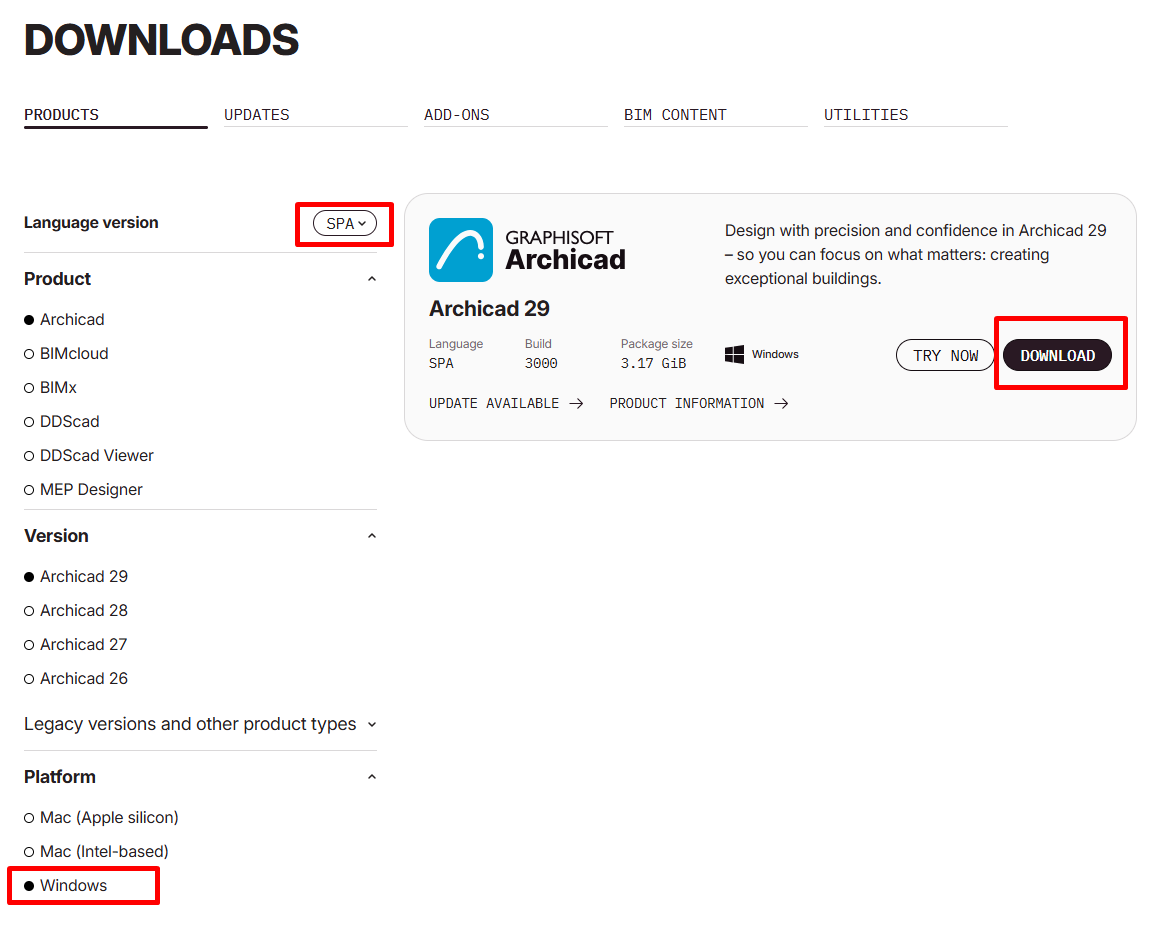
Step 2: Run the Installer
- Navigate to the location where you saved the downloaded file.
- Double-click the installer file to start the installation process.
Step 3: Follow the Installation Wizard
- Licence Agreement: Read and accept the End User Licence Agreement (EULA).
- Installation Type: Select the installation type you prefer. For example, Typical (recommended option) or Custom.
- Destination Folder: Choose the folder where you want to install Archicad.
Step 4: Install Components
- The installer will copy the necessary files and install the required components.
- This process may take a few minutes.
Step 5: Complete the Installation
- Once the installation is complete, you may need to restart your computer.
- After restarting, Archicad will be ready to use.