
Articles in this section
- How to Uniquely Identify Hotlink Module Zones in Archicad Schedules?
- How to Set the Origin of a 3D Texture in Archicad?
- Why Do Drawings Exported to PDF in Archicad Generate Very Large Files?
- How to Map a Custom Archicad Property to an IFC Property?
- How to Remove an Archicad Educational Licence from a Computer?
- How to Change an Archicad File Started in the International Version to the Spanish Version?
- How to Import a PDF to Use as a Reference in Archicad?
- How to Use Educational and Commercial Versions of Archicad on the Same Computer?
- How to Get the Archicad Connection with Twinmotion?
- How to Create a Structural Frame with the Create Truss Tool in Archicad?
How Can I Create a Curved Ramp in Archicad 29?
Curved ramps in Archicad are created using a specific object available within the Object Tool, located on the left-hand panel. This procedure guides you step by step through locating, configuring and correctly placing a curved ramp in your Archicad 29 project.
1. Accessing the tool
- Open your project in Archicad.
- In the left-hand panel (Archicad toolbar), select the Object Tool (grey cube icon).
- Open the object settings by clicking Object Default Settings at the top, or pressing Ctrl/Cmd + T.
2. Locating the curved ramp object
- In the object selection window, make sure you are using the Archicad 29 Library.
- Browse through the folders until you reach:
04 Construction → Stairs and Ramps → Ramps. -
Select the “Curved Ramp” object.
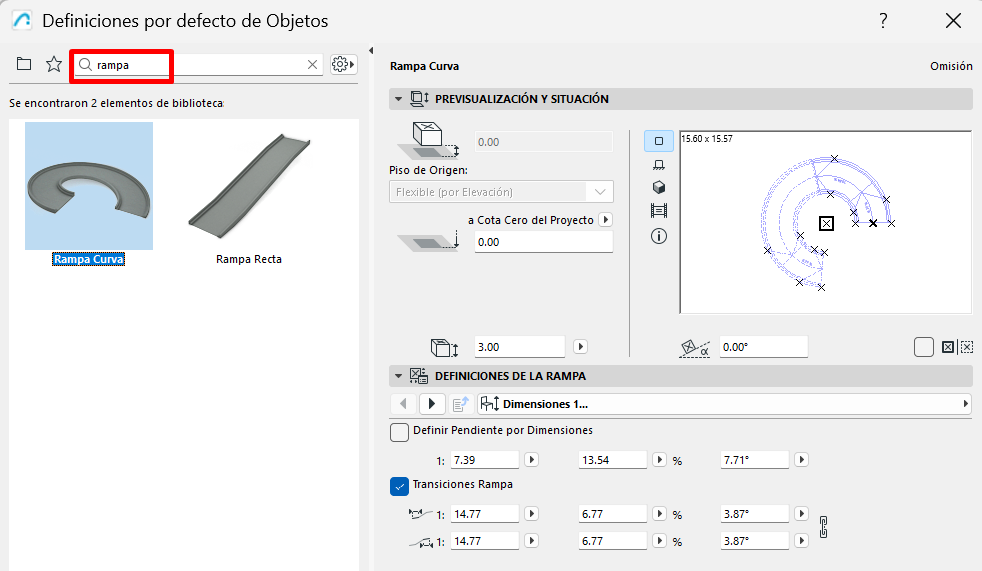
Note: If you can’t find the ramps folder, check that the Archicad 29 library is correctly loaded in your project.
3. Configuring the essential parameters
- With the Curved Ramp selected, review the Geometry parameters:
- Ramp type (circular or helical).
- Inner radius and outer radius.
-
Usable width of the ramp.
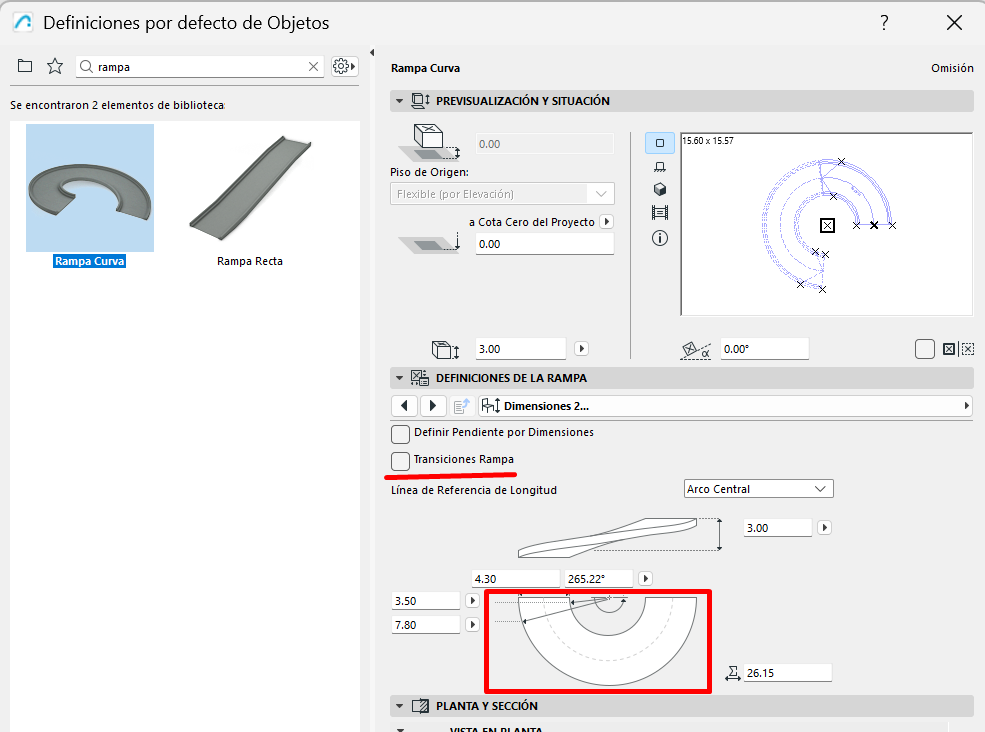
- Set the slope:
- By entering the height difference between start and end, or
- By entering the slope (%) directly, if the object allows it.
-
Adjust the segmentation of the curve by setting the number of segments to control how smooth the ramp looks in 3D.
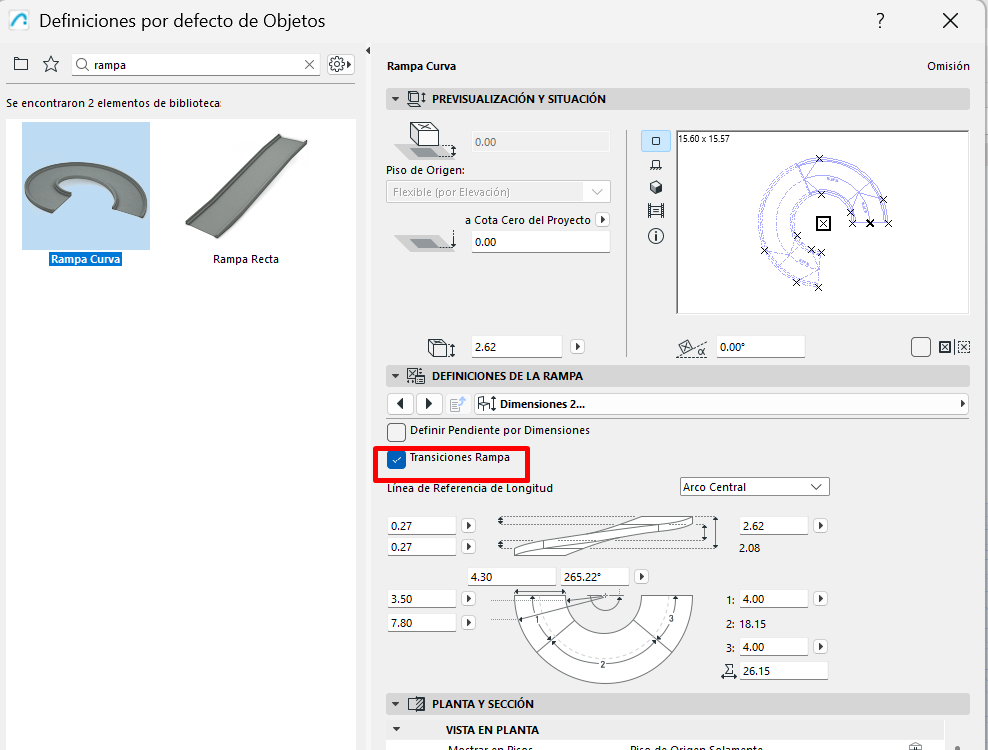
- Set the representation:
- Surface materials.
- Fills and floor plan line type.
- Graphic symbols (arrows, outlines, etc.).
Tip: In the early stages of a project, use fewer segments to improve model performance. You can increase the curve’s resolution later for final drawings.
4. Placing the ramp on the floor plan
- Make sure the Object Tool is active and the Curved Ramp object is configured correctly.
- Position yourself on the storey where the ramp will start (for example, the ground floor).
- Click the point where you want to set the origin of the ramp.
- Move the cursor to define:
- The direction of the curve.
- The radius of the ramp.
- Click again to set the length of the ramp, or enter precise numeric values if you prefer.
Note: Check that the final height of the ramp matches the level of the storey above, to avoid jumps or misalignments between elements.
5. Final adjustments in 3D
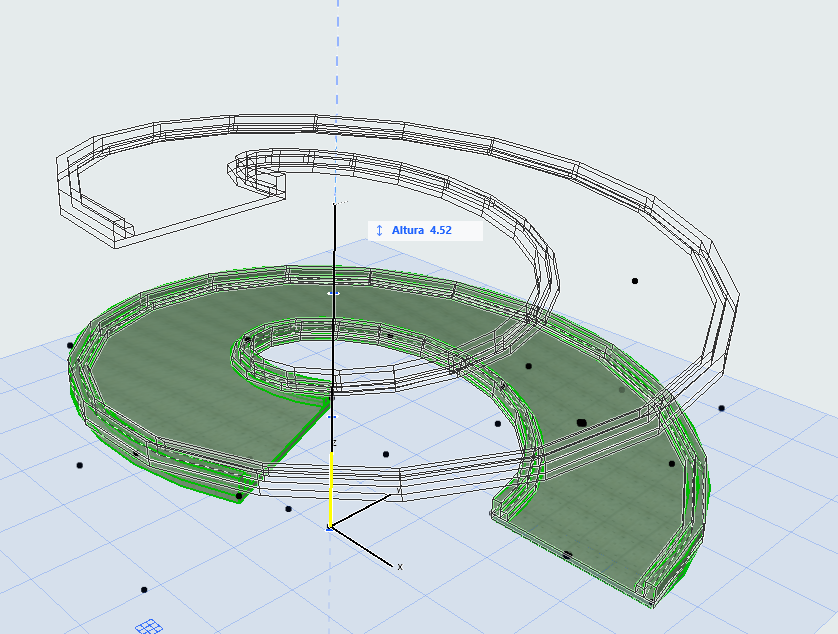
- Switch to the 3D view to check the curved ramp in the model.
- Use the hotspots to adjust:
-
The start or end height.
-
- Check for clashes with other elements (slabs, walls, railings, etc.) using the 3D cutting and filtering tools.
6. Technical recommendations
- For especially complex ramps (multi-turn helical ramps or very specific geometries), you can combine complex profiles with the Morph tool, only when the standard ramp object doesn’t cover the need.
- Adjust the curve resolution according to the project phase: lower detail for initial sketches, higher detail for final documentation.
- Always check that the slope and ramp width comply with applicable accessibility and safety regulations (for example, national accessibility standards).
Tip: Save a well-configured Curved Ramp object as an Archicad favourite so you can reuse it in future projects and keep a consistent design standard.
Related articles
- How to Uniquely Identify Hotlink Module Zones in Archicad Schedules?
- How to Set the Origin of a 3D Texture in Archicad?
- Why Do Drawings Exported to PDF in Archicad Generate Very Large Files?
- How to Map a Custom Archicad Property to an IFC Property?
- How to Remove an Archicad Educational Licence from a Computer?