
Articles in this section
- How to Uniquely Identify Hotlink Module Zones in Archicad Schedules?
- How to Set the Origin of a 3D Texture in Archicad?
- Why Do Drawings Exported to PDF in Archicad Generate Very Large Files?
- How to Map a Custom Archicad Property to an IFC Property?
- How to Remove an Archicad Educational Licence from a Computer?
- How to Change an Archicad File Started in the International Version to the Spanish Version?
- How to Import a PDF to Use as a Reference in Archicad?
- How to Use Educational and Commercial Versions of Archicad on the Same Computer?
- How to Get the Archicad Connection with Twinmotion?
- How to Create a Structural Frame with the Create Truss Tool in Archicad?
How to Change the Language of the Global Library?
Changing the display language of library objects and their folder structure in an existing Archicad project is done using the Library Localization Preferences tool.
Purpose
This feature lets you modify:
- The text shown in the user interface of each object.
- The organisation of the objects within the folder structure, since different regions may have different hierarchies.
Important: Applying localisation changes can take time and cannot be undone. It is recommended to save a backup of the project before continuing.
Steps
-
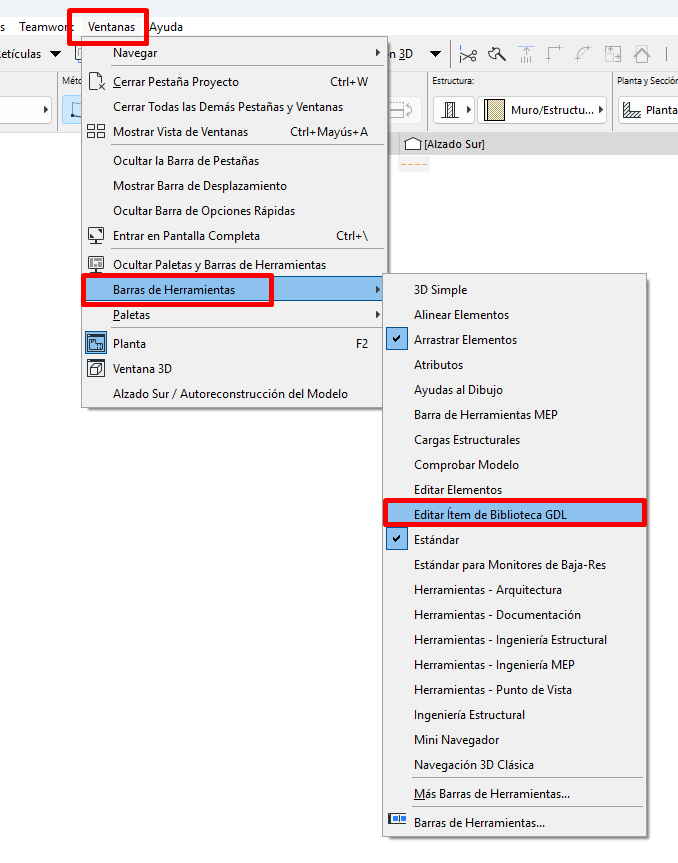
Step 1 — Open the Edit GDL Library Parts toolbar
- From the main menu, select: Window > Toolbars > Edit GDL Library Parts.
-
This toolbar gives access to the advanced library management and configuration tools.
-
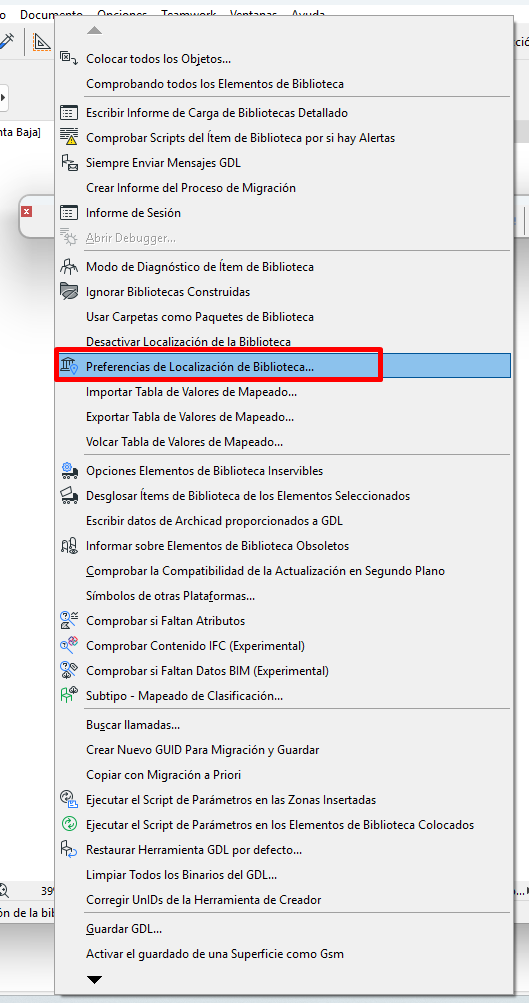
Step 2 — Access the commands menu
- At the left end of the toolbar, open the dropdown menu (library developer icon).
- This menu includes the GDL development commands and the localisation configuration options.

-
Step 3 — Open Library Localization Preferences
- Select the Library Localization Preferences command from the dropdown menu.
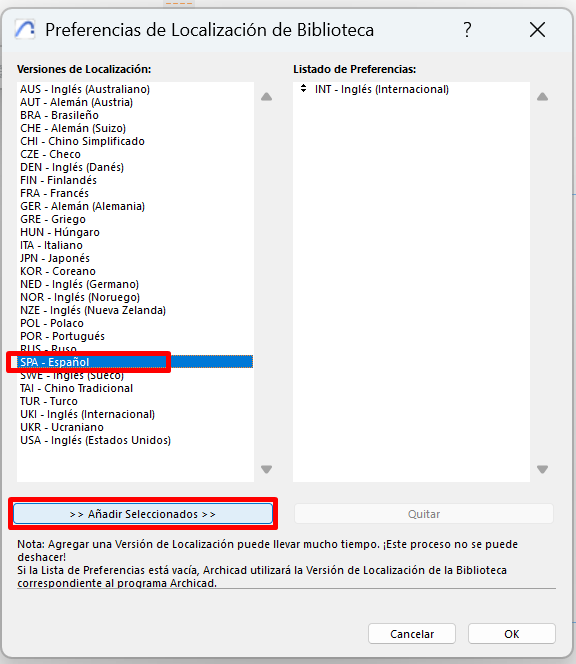
- The corresponding dialog box will open, containing two panels:
- Left panel: shows the available languages that have not yet been added.
-
Right panel: shows the list of active languages ranked by priority.
-
Step 4 — Add or reorder language versions
-
Select the language in the left panel and click Add Selected.
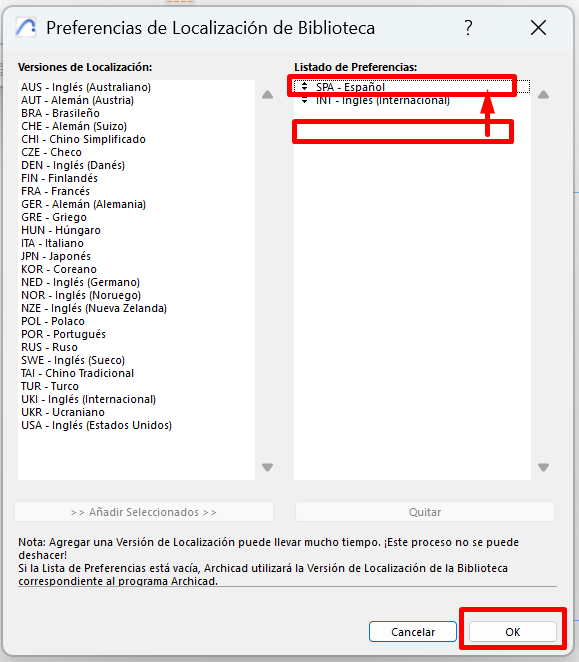
- The language will appear in the right panel, where you can reorder it by dragging and dropping to set its priority.
-
Tip: you can keep several languages in the list. Archicad will display the top language first and use the lower ones if translated text is missing.
-
-
Step 5 — Apply the changes
- When you close the dialog box, Archicad will apply the new language settings to all loaded library parts.
- Depending on the size of the project and the complexity of the library, this process can take several minutes.
- Important: language changes cannot be automatically reverted. To go back, restore the project from the backup.
Result
- Object names, parameter labels and interface text will appear in the selected language.
- The folder structure in the Project Library will be reorganised according to the regional standard of the applied language.
Related articles
- How to Uniquely Identify Hotlink Module Zones in Archicad Schedules?
- How to Set the Origin of a 3D Texture in Archicad?
- Why Do Drawings Exported to PDF in Archicad Generate Very Large Files?
- How to Map a Custom Archicad Property to an IFC Property?
- How to Remove an Archicad Educational Licence from a Computer?