
Articles in this section
- How to Uniquely Identify Hotlink Module Zones in Archicad Schedules?
- How to Set the Origin of a 3D Texture in Archicad?
- Why Do Drawings Exported to PDF in Archicad Generate Very Large Files?
- How to Map a Custom Archicad Property to an IFC Property?
- How to Remove an Archicad Educational Licence from a Computer?
- How to Change an Archicad File Started in the International Version to the Spanish Version?
- How to Import a PDF to Use as a Reference in Archicad?
- How to Use Educational and Commercial Versions of Archicad on the Same Computer?
- How to Get the Archicad Connection with Twinmotion?
- How to Create a Structural Frame with the Create Truss Tool in Archicad?
How to Dimension False Ceiling Height in Archicad?
Two available options are explained below: using a Label and using a Level Dimension.
Option 1 - Use the Label Tool
- Select the Label tool and open its settings.
-
For the label type, select False Ceiling Height Label.
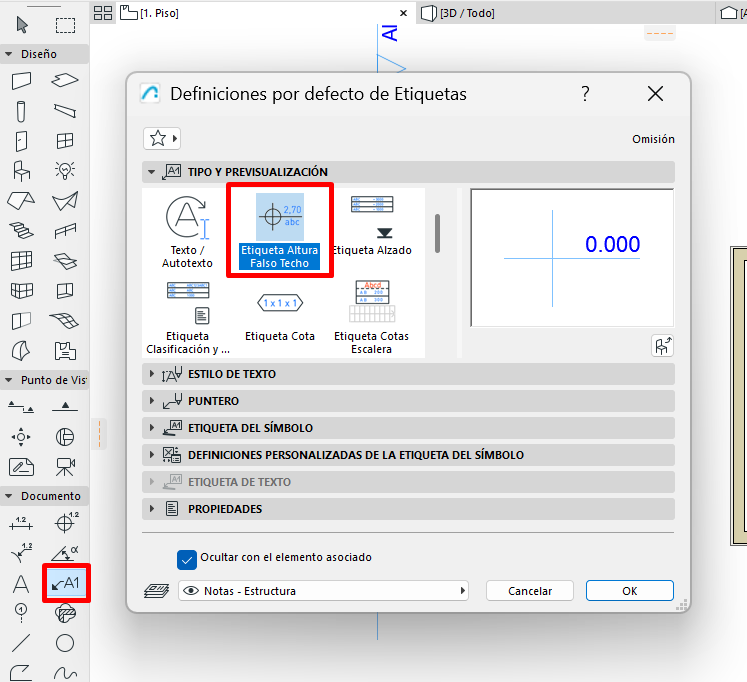
-
Go to the “Custom Settings of the Symbol Label” tab and set the configuration you need.
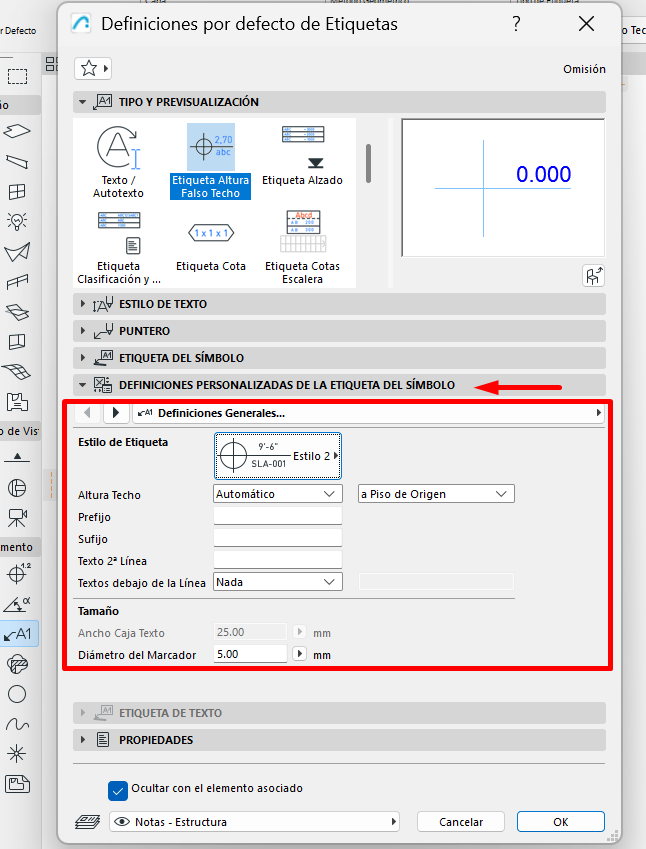
- Place the label on the false ceiling in the floor plan.
Option 2 - Use the Level Dimension Tool
Important: This option works correctly on projects with 3 storeys.
To use this method, you first need to define a reference level.
Step 1 - Define the Reference Level
-
Go to Options → Project Preferences → Reference Levels.
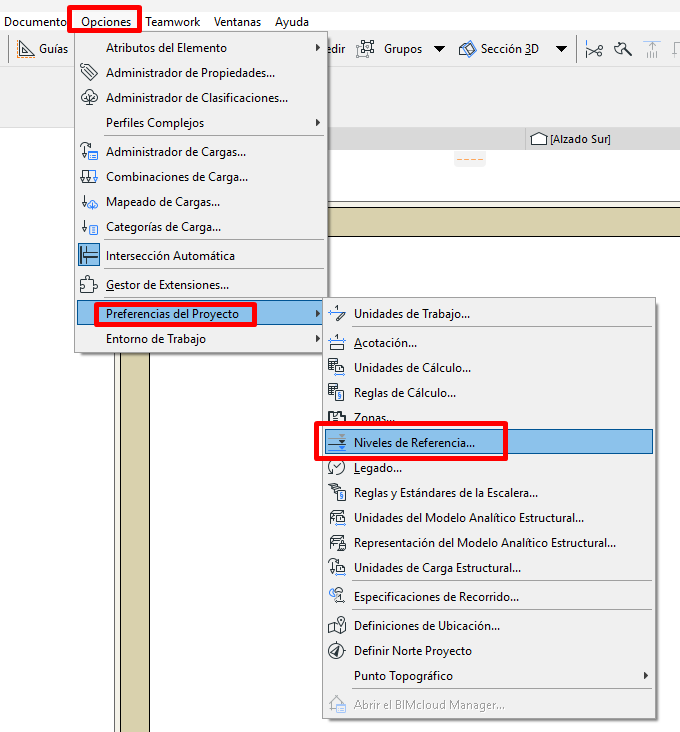
-
Define the height of the 1st Reference Level, for example, using the height of the first storey.
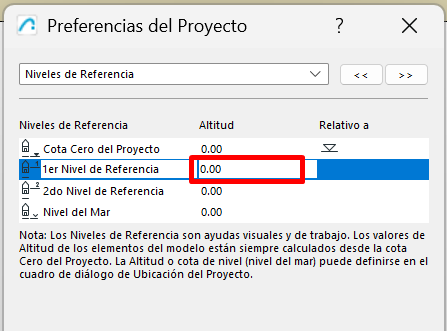
- Confirm the changes.
Step 2 - Configure the Level Dimension
- Select the Level Dimension tool and open its settings.
- Go to the “Text Content” tab.
- Select the Custom option.
- If there is existing content, delete it.
-
Click Insert Autotext.
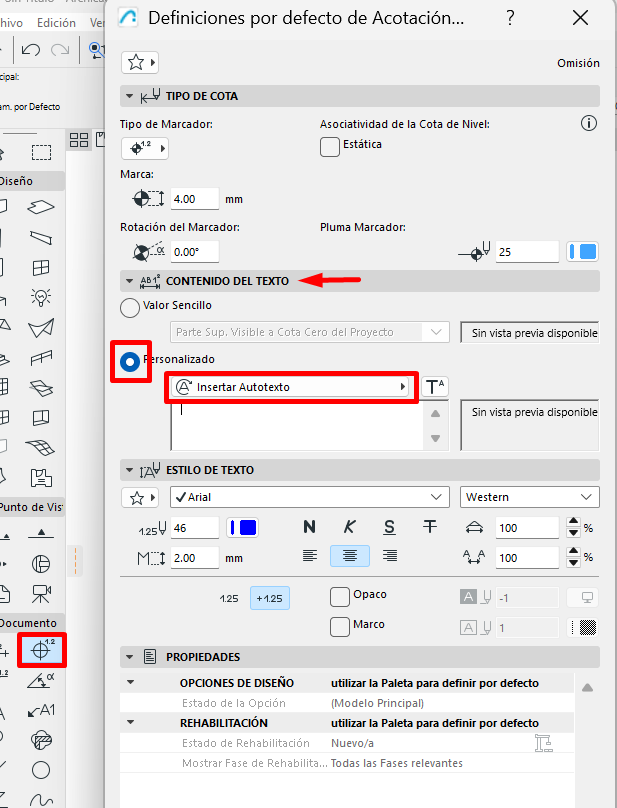
-
Select Bottom to 1st Reference Level and click Add.
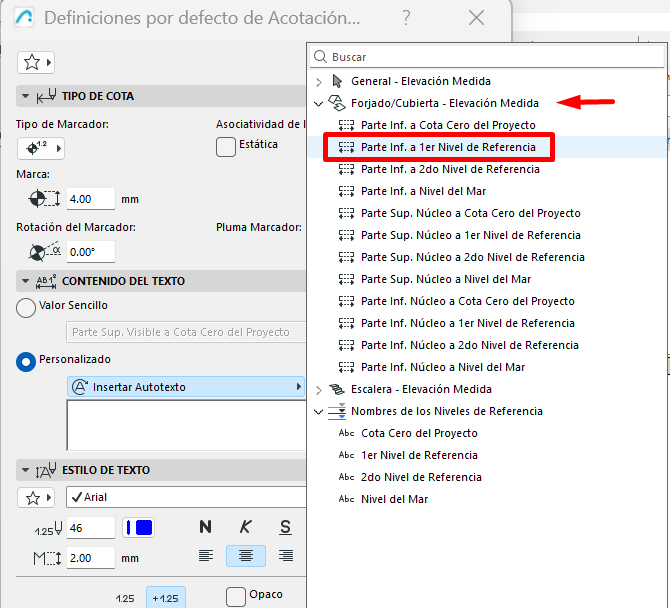
- Place the level dimension on the false ceiling in the floor plan.
Related articles
- How to Uniquely Identify Hotlink Module Zones in Archicad Schedules?
- How to Set the Origin of a 3D Texture in Archicad?
- Why Do Drawings Exported to PDF in Archicad Generate Very Large Files?
- How to Map a Custom Archicad Property to an IFC Property?
- How to Remove an Archicad Educational Licence from a Computer?