
Articles in this section
- How to Uniquely Identify Hotlink Module Zones in Archicad Schedules?
- How to Set the Origin of a 3D Texture in Archicad?
- Why Do Drawings Exported to PDF in Archicad Generate Very Large Files?
- How to Map a Custom Archicad Property to an IFC Property?
- How to Remove an Archicad Educational Licence from a Computer?
- How to Change an Archicad File Started in the International Version to the Spanish Version?
- How to Import a PDF to Use as a Reference in Archicad?
- How to Use Educational and Commercial Versions of Archicad on the Same Computer?
- How to Get the Archicad Connection with Twinmotion?
- How to Create a Structural Frame with the Create Truss Tool in Archicad?
How to Export an Architectural IFC Model from Archicad Using Model Filtering for Export?
Reading time: 4 min.
In the BIM model-exchange workflow, correctly exporting an IFC file is key to ensuring coordination between disciplines and delivering accurate information. In this guide, we show you how to configure and use Model Filtering for Export in Archicad to obtain an optimised IFC file tailored to your project's needs.
Objective
Learn how to export a clean, specific IFC file from Archicad, adjusting both the export translator and the element filters when saving.
Prerequisites
- Archicad installed with an architectural project open.
- Permission to edit Archicad's IFC Translators (if working in Teamwork).
Step 1: Configure Model Filtering in the IFC Translator
- Go to File > Interoperability > IFC > IFC Translators.
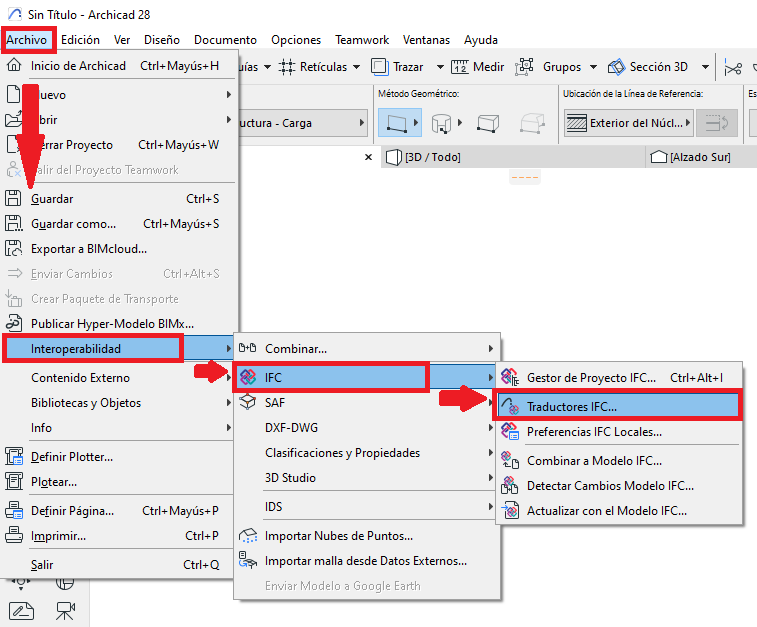
- In the Export section, select the translator you will use (for example, IFC4 Reference View or Parametric Geometry Export).
- Create a duplicate of the selected translator by clicking New...
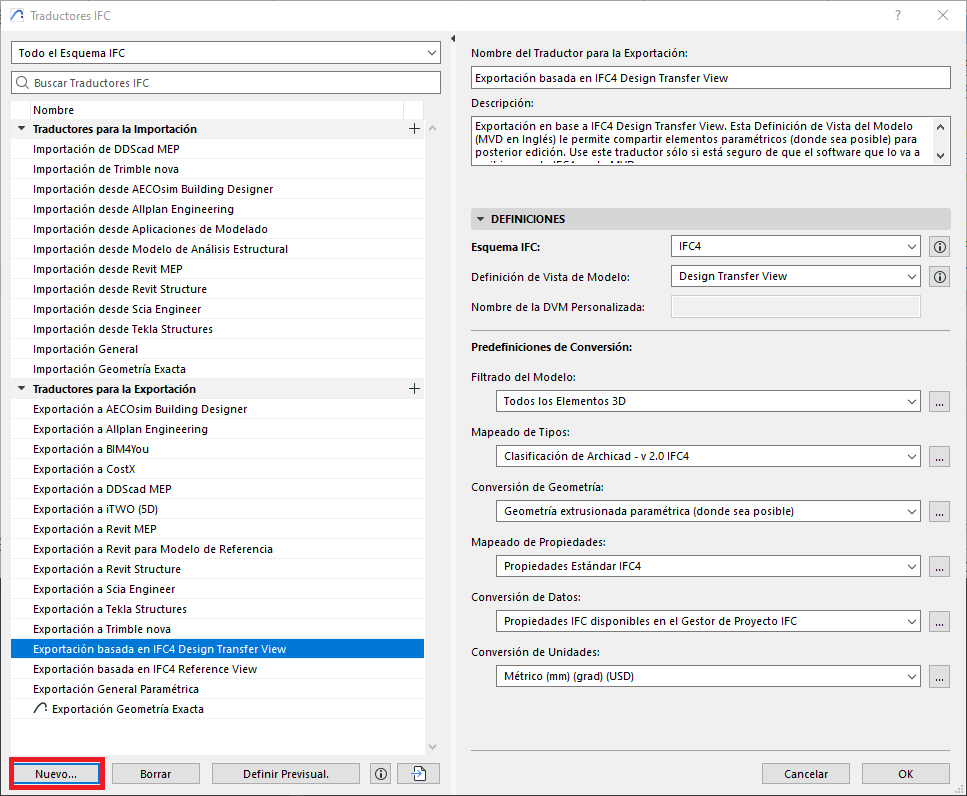
- In the New Translator dialog box, select the "Duplicate of" option and make sure the translator being duplicated is the correct one.
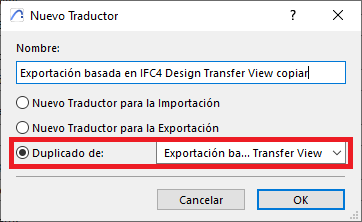
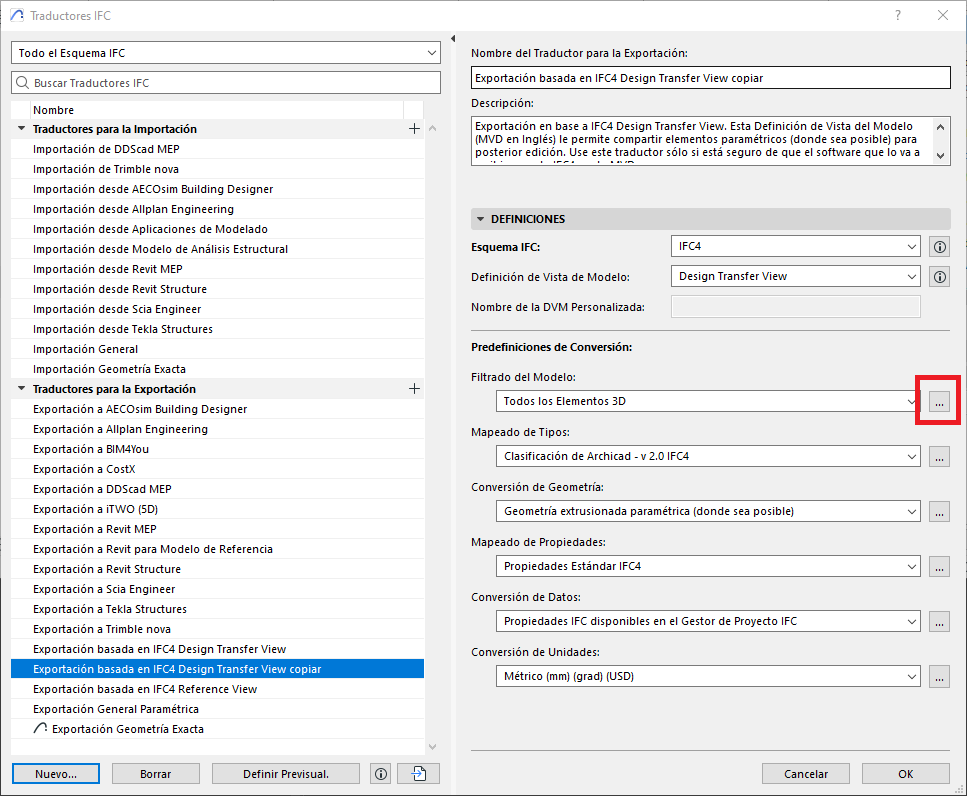
- Select the duplicated translator, and assign it a new Name (red), and a brief Description (green).
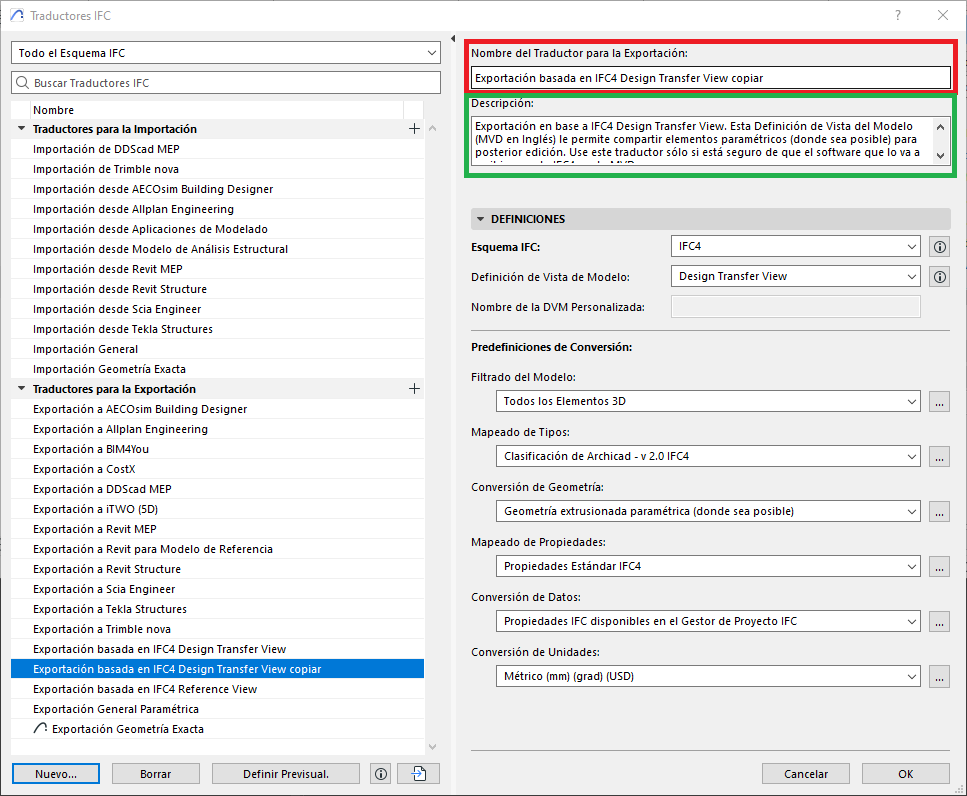
- Click the three dots next to Model Filter.
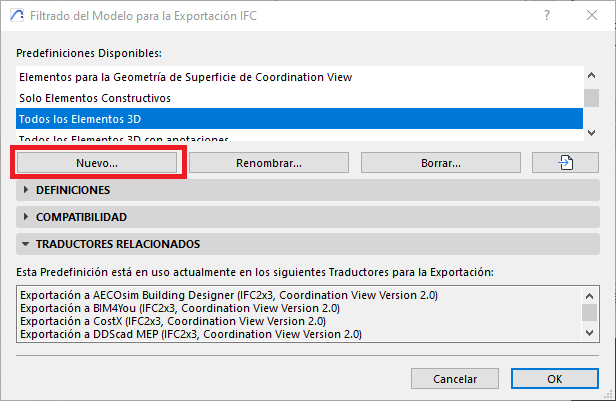
- In the "Model Filter for IFC Export" dialog box, select a filter type to create a duplicate by clicking New...
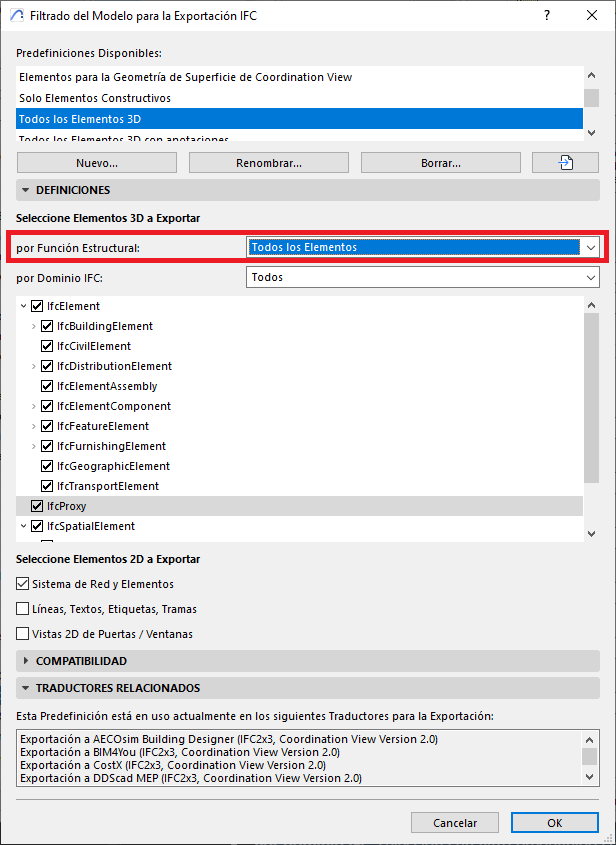
- Under Settings, in the Select 3D Elements to Export section, under Structural Function, choose Load-Bearing elements only or All elements.
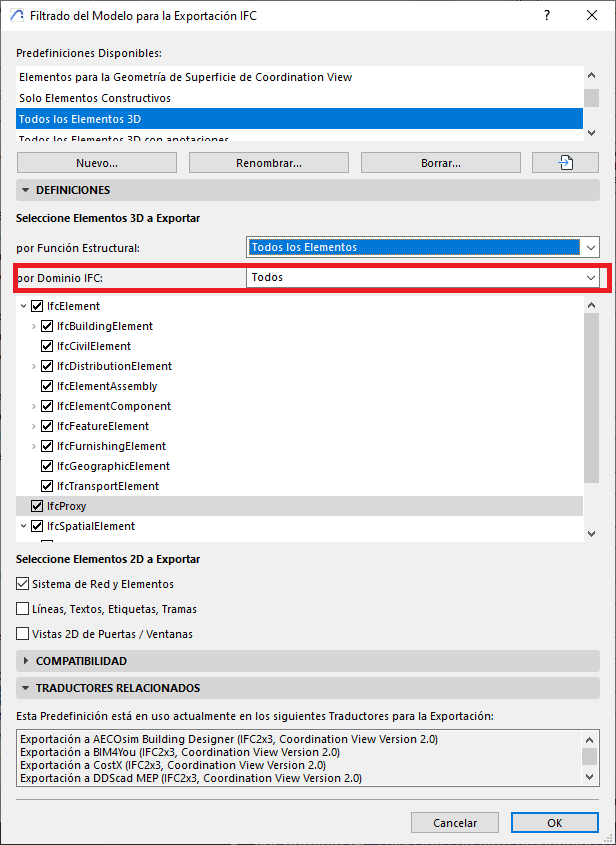
- Under By IFC Domain: select a predefined custom filter, or make sure to include all elements needed to send as IFC (green) if the Domain is "Custom".
-
Under Select 2D Elements to Export, define whether to include:
- Grid System and Elements (IfcGrid).
- Lines, Texts, Labels, Fills and dimensions (IfcAnnotation).
- Door/Window 2D Views.
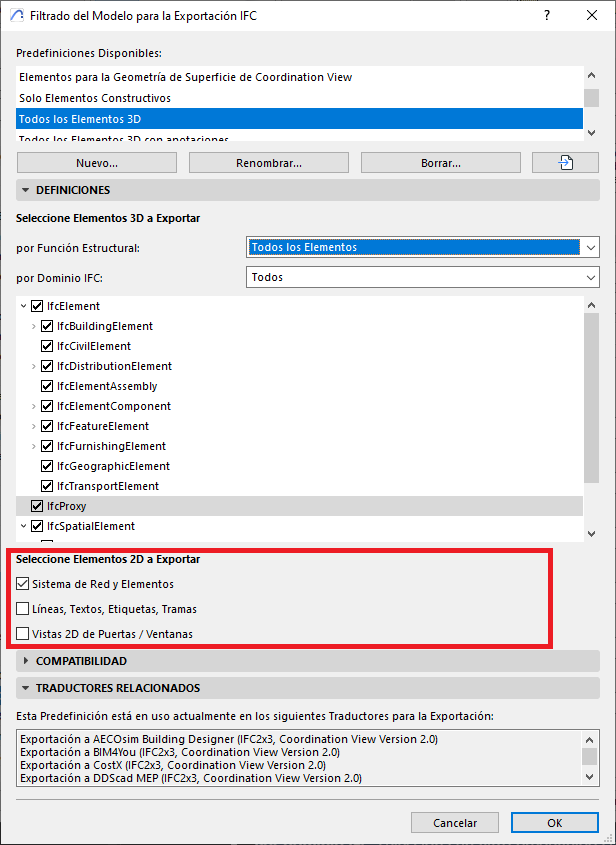
- Save your changes by clicking OK
- In the IFC Translators dialog box, make sure the new filter profile is selected under Model Filter.
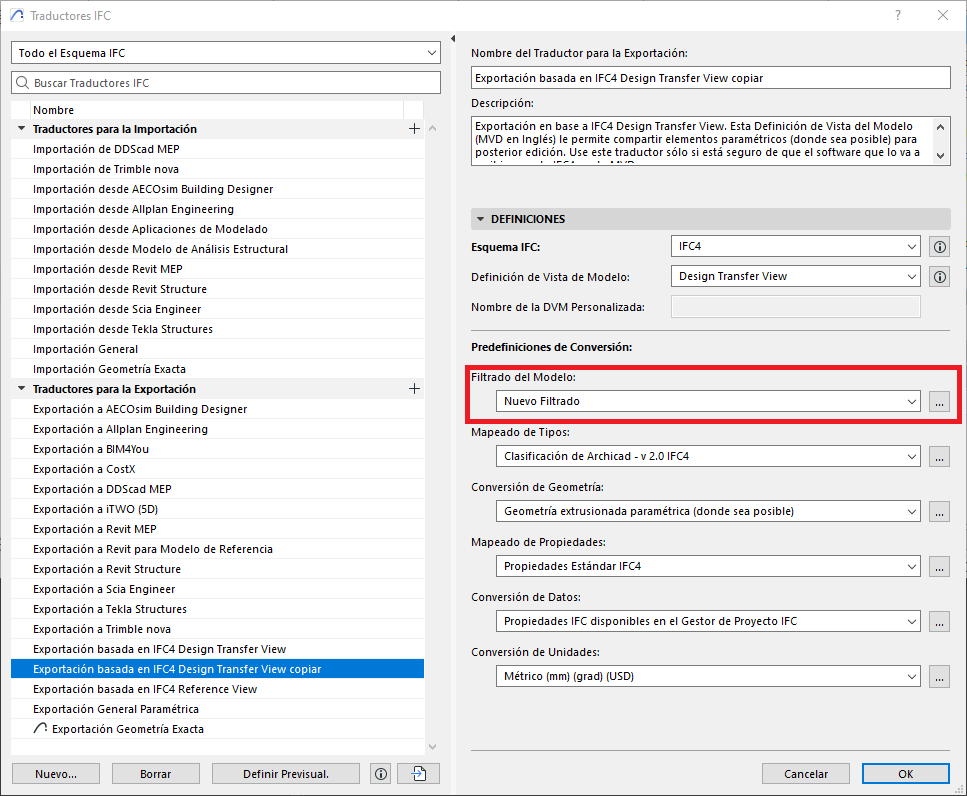
- Save the Translator by clicking OK.
Step 2: Prepare the Export View
- Activate the view you will export from (Floor Plan or 3D) and adjust layers, renovation filters, etc.
- (Optional) Manually select the elements if you will use Selected elements only.
Step 3: Save As IFC
- Go to File > Save as…
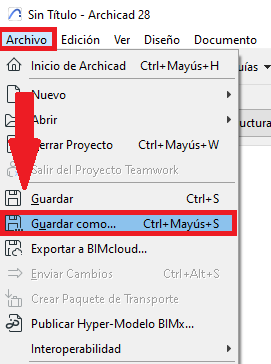
- In the Save dialog box, choose IFC File (*.ifc).
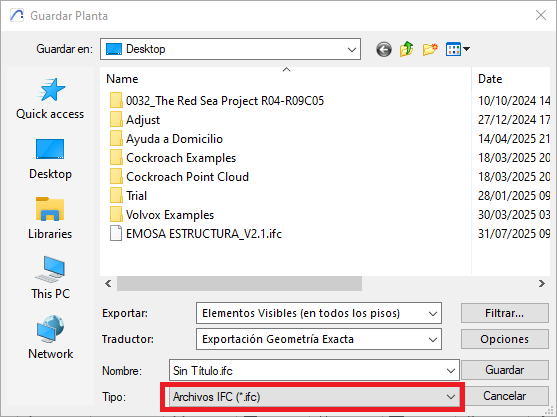
- Confirm the configured translator.
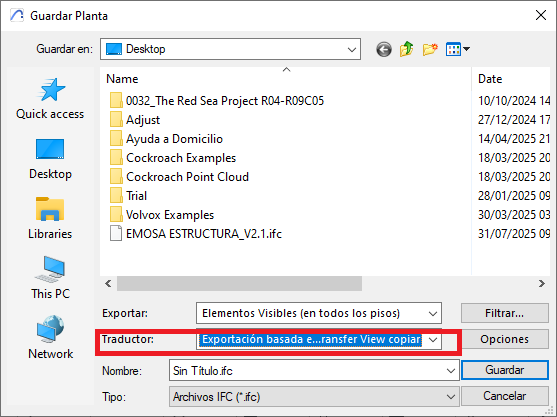
- Under Export, select:
- Selected elements only, if the current view has some elements selected.
- Entire project.
- Visible elements (on all stories).
- All elements on the current story.
- Visible elements on the current story.
- Click Filter… to group and refine by IFC Element Type, Story, Layer, or Element Owner, and apply filters by IFC Domain or Structural Function.
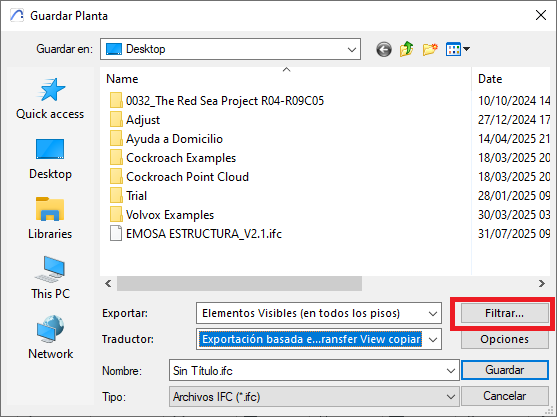
- Define the location where you want to save the IFC file and click Save to save the file.
Export from the Publisher
The Publisher always exports Visible Elements, so prepare your views according to this criterion.
Post-Export Validation
Open the IFC in a compatible viewer to check that:
- Only the elements from the intended domain appear.
- The exported set matches the export mode chosen, or the one agreed with the recipient.
Pro Tip
- Create dedicated translators for each exchange scenario: for example, IFC4 RV — Architecture (without 2D) and IFC2x3 — Coordination (with grids and annotations). This standardises deliverables and reduces errors.
- Always review the IFC file in an IFC viewer to make sure the IFC meets expectations. You can use this free viewer for that: DDScad Viewer
Related articles
- How to Uniquely Identify Hotlink Module Zones in Archicad Schedules?
- How to Set the Origin of a 3D Texture in Archicad?
- Why Do Drawings Exported to PDF in Archicad Generate Very Large Files?
- How to Map a Custom Archicad Property to an IFC Property?
- How to Remove an Archicad Educational Licence from a Computer?