
Articles in this section
- How to Uniquely Identify Hotlink Module Zones in Archicad Schedules?
- How to Set the Origin of a 3D Texture in Archicad?
- Why Do Drawings Exported to PDF in Archicad Generate Very Large Files?
- How to Map a Custom Archicad Property to an IFC Property?
- How to Remove an Archicad Educational Licence from a Computer?
- How to Change an Archicad File Started in the International Version to the Spanish Version?
- How to Import a PDF to Use as a Reference in Archicad?
- How to Use Educational and Commercial Versions of Archicad on the Same Computer?
- How to Get the Archicad Connection with Twinmotion?
- How to Create a Structural Frame with the Create Truss Tool in Archicad?
How to Use Interactive Schedules to Detect and Resolve Inconsistent Elements?
Reading time: 4 min.
In projects of a certain scale and complexity, it's common for modelling elements to show inconsistencies that affect the correct interpretation of the BIM model. In Archicad, these discrepancies can be clearly revealed through Interactive Schedules, especially when apparently identical elements aren't grouped together despite having the Merge items option turned on. This article aims to show how to use Interactive Schedules as a diagnostic tool to quickly identify such inconsistencies, allowing them to be corrected efficiently and improving the quality and consistency of the BIM model in record time.
Audience
Architects, BIM coordinators and support technicians who manage models (single or federated) in Archicad and need to generate precise, condensed listings.
Prerequisites
Archicad 25, or higher
Basic knowledge of how to create and configure an Interactive Schedule
Access to the project model, or its federated models.
Resolution Steps:
Open the model:
Open the project's BIM model.
-
Create a new Interactive Schedule:
Go to Document > Schedules > Scheme Settings
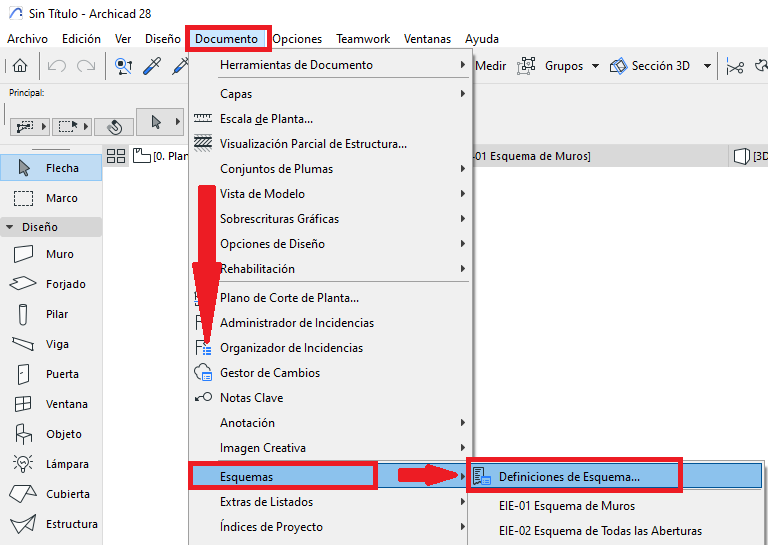
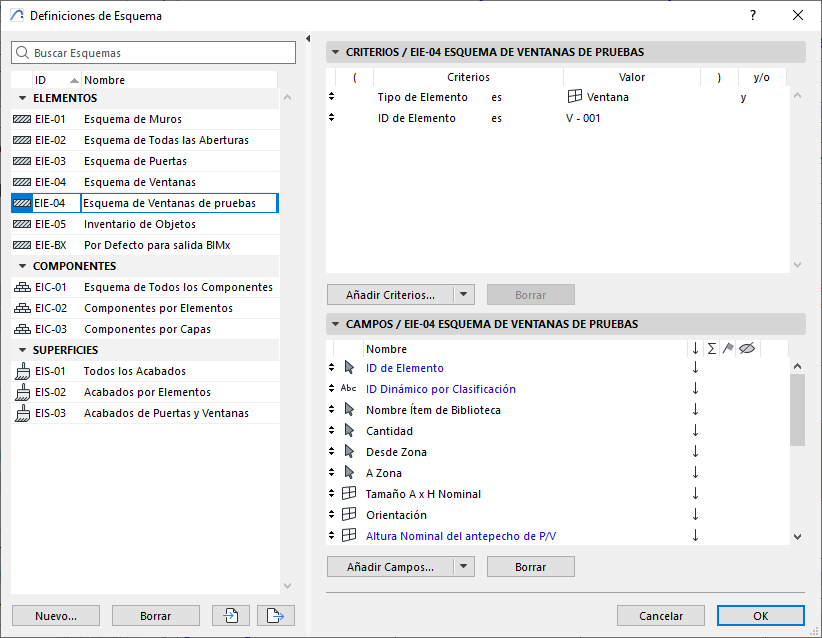
- The Scheme Settings dialog box will open, and we create the element schedule with the Element Type you want to audit, which for this example will be windows, making this an element schedule
-
Define the filter and the grouping field:
- Apply an active filter to include only the desired element type, which for this example would be windows.
- We'll also include another filter field to include only one property of the element, which for this example would be Element ID.
- In the Fields section, we'll include all the fields that need to be audited (see image).
- Turn on the "Merge items" option
The aim is for Archicad to automatically combine all similar elements under the same column.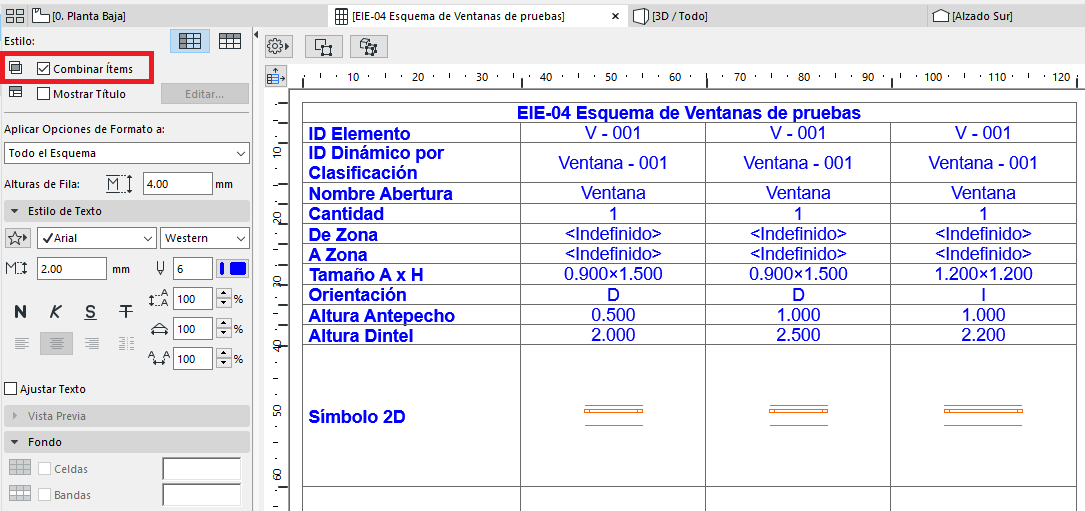
-
Analyse the schedule's behaviour:
When you open the Interactive Schedule view, you'll see a view similar to the image. If we look closely, we'll see that in the fields marked in red, the reason or reasons why the Window elements with Element ID V-001 haven't been merged into a single column will be shown. In this example, it can be deduced that this is due to: opening direction, sill height, and lintel height.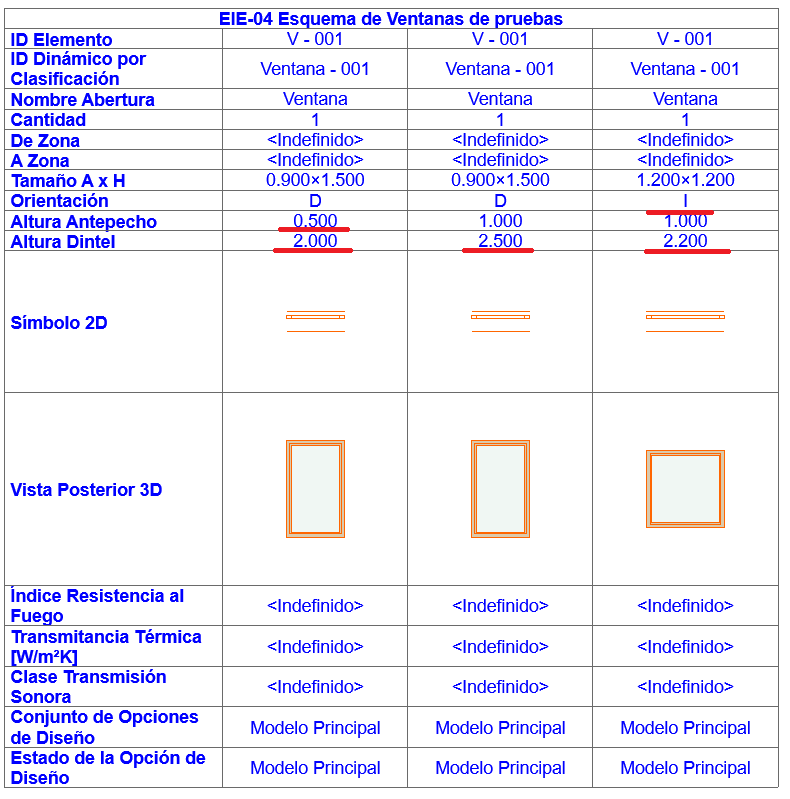
-
Fix the problematic field:
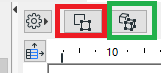
Once the problematic field or fields have been identified, most can be edited directly, simply by selecting that field and adding the new value. However, some fields can only be edited by opening their dialog box, which can be done by selecting the object and clicking on one of these icons, where:- Select on Floor Plan (red): to open the floor plan view with the element selected
-
Select in 3D (green): to open the 3D view with the element selected
-
(Optional) Export and reuse the schedule configuration:
Once the Interactive Schedule shows the information the way you need it, you can save and export the configuration for reuse. This is a particularly useful feature for other projects, or projects made up of several federated models.
Sample File:
You can download a sample project file where an Interactive Schedule has been correctly configured with a custom property that counts elements by units:
Related articles
- How to Uniquely Identify Hotlink Module Zones in Archicad Schedules?
- How to Set the Origin of a 3D Texture in Archicad?
- Why Do Drawings Exported to PDF in Archicad Generate Very Large Files?
- How to Map a Custom Archicad Property to an IFC Property?
- How to Remove an Archicad Educational Licence from a Computer?