
Articles in this section
- How to Uniquely Identify Hotlink Module Zones in Archicad Schedules?
- How to Set the Origin of a 3D Texture in Archicad?
- Why Do Drawings Exported to PDF in Archicad Generate Very Large Files?
- How to Map a Custom Archicad Property to an IFC Property?
- How to Remove an Archicad Educational Licence from a Computer?
- How to Change an Archicad File Started in the International Version to the Spanish Version?
- How to Import a PDF to Use as a Reference in Archicad?
- How to Use Educational and Commercial Versions of Archicad on the Same Computer?
- How to Get the Archicad Connection with Twinmotion?
- How to Create a Structural Frame with the Create Truss Tool in Archicad?
How to Use Special Objects for Walls in Archicad?
Archicad makes it possible to use special objects for walls through an Add-On included in the Goodies, making it easy to add parametric elements such as mouldings, panelling, special skirtings and other accessories associated with walls. This article explains how to install, configure and use them correctly.
Step 1 - Download and install the Add-On (Goodies)
- Go to Graphisoft’s official Goodies download page:
Goodies para Archicad 29 – Graphisoft España - Select the corresponding operating system.
-
Run the installer and, in the list of available components, select the Accessories Add-On (for Wall/Roof/Slab).
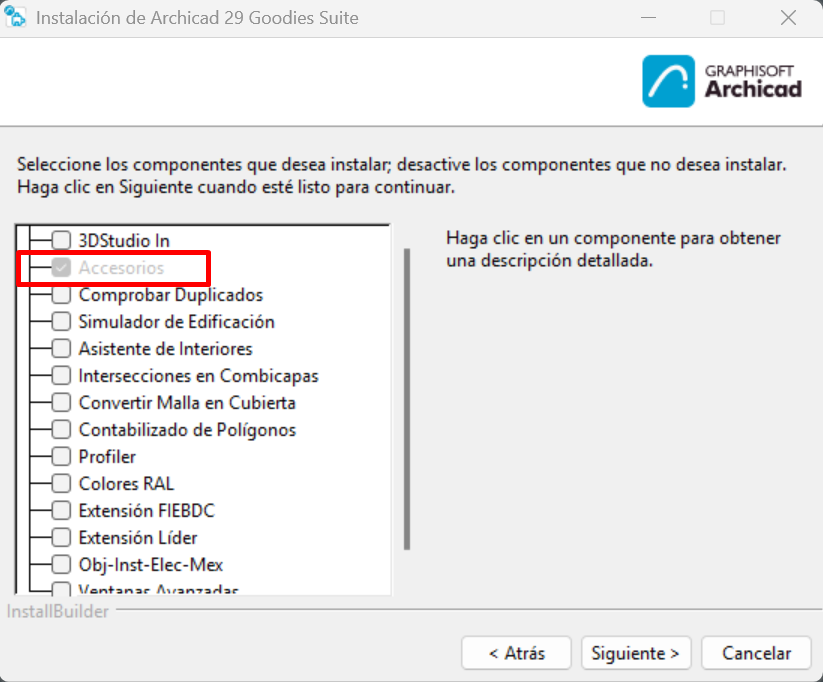
- On this same screen, you can select and install any other Add-Ons you want, according to your working needs.
- Finish the installation and start Archicad.
Note: The Goodies version must match the installed Archicad version to avoid compatibility issues.
Step 2 - Load the special objects library into the project
For the special objects to work correctly, the project’s libraries need to be prepared.
- Open the Library Manager in Archicad.
-
Add the special objects library you want to use, for example a library container with BIMobjects macros.
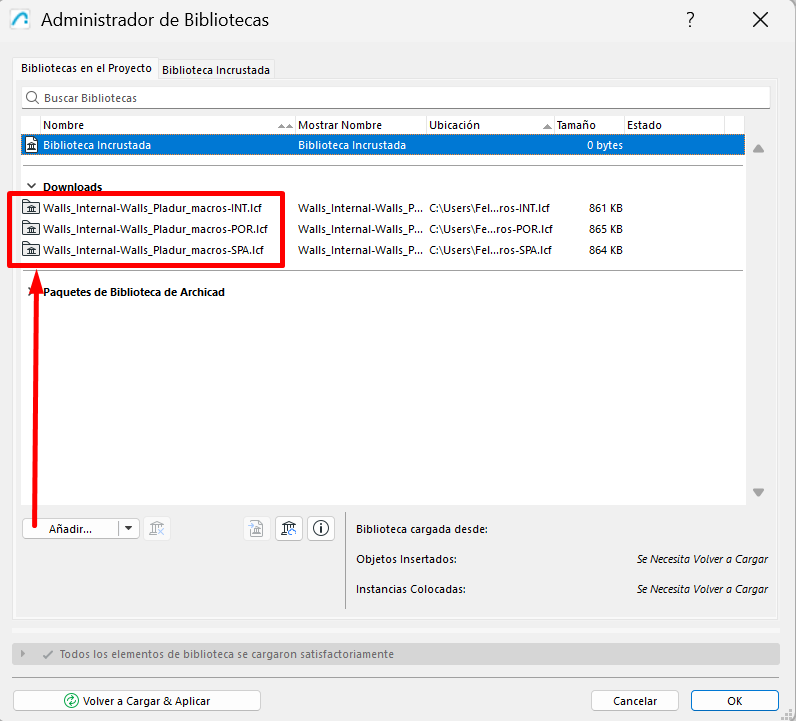
-
Also add to the project’s embedded library the special elements you are going to use, to ensure they are correctly available. For example, .GSM files.
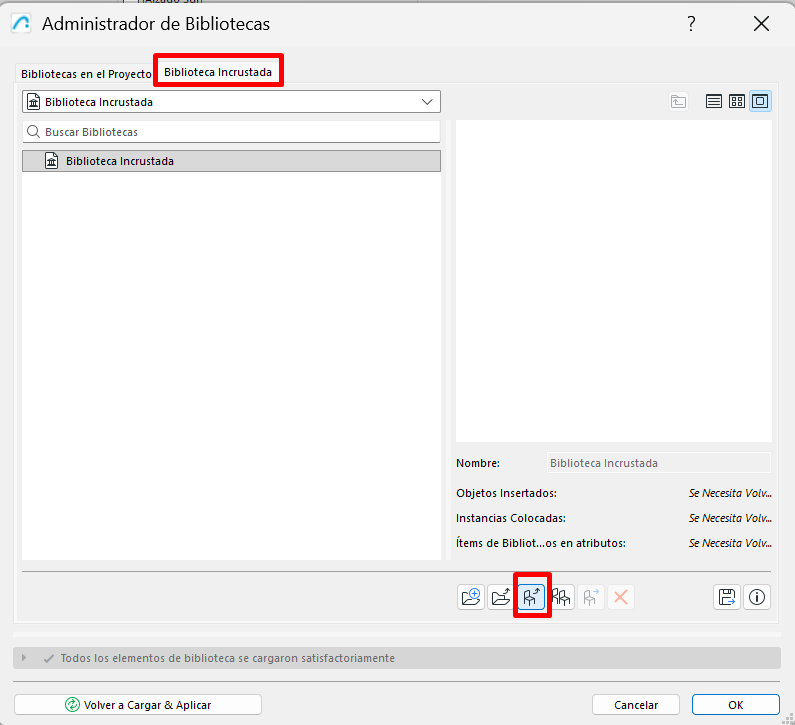
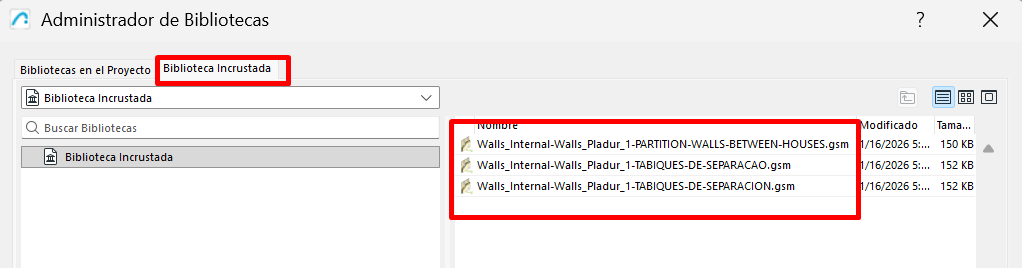
Step 3 - Placing special objects associated with a wall
- On the floor plan, select the wall you want to work on.
- Go to the Design → Design Extras → Accessories menu.
- Select the Wall Accessories option.
-
In the dialog box, choose the special object and adjust its parameters (dimensions, surfaces, 2D/3D representation, orientation, etc.).
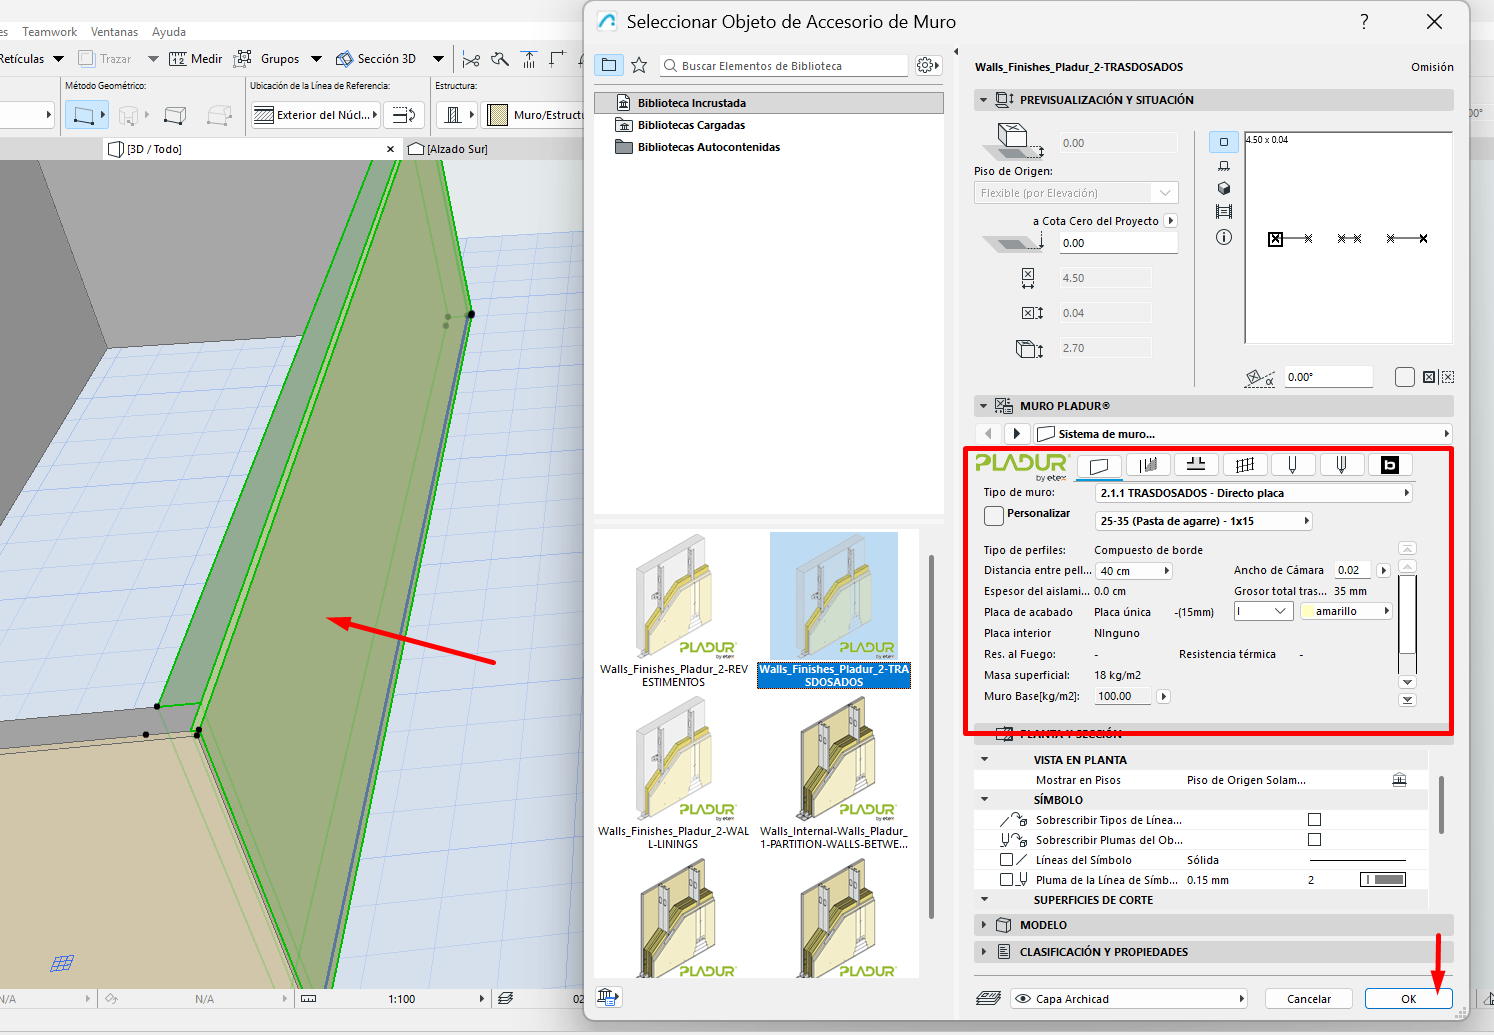
-
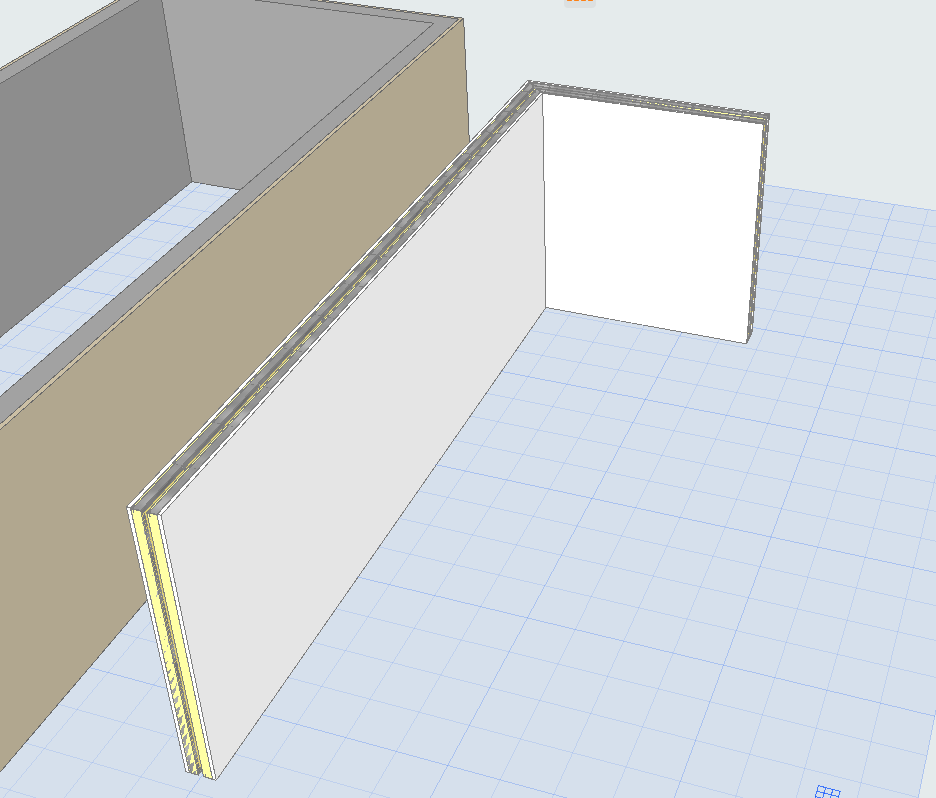
Confirm the wall face on which to place the accessory on the selected wall.
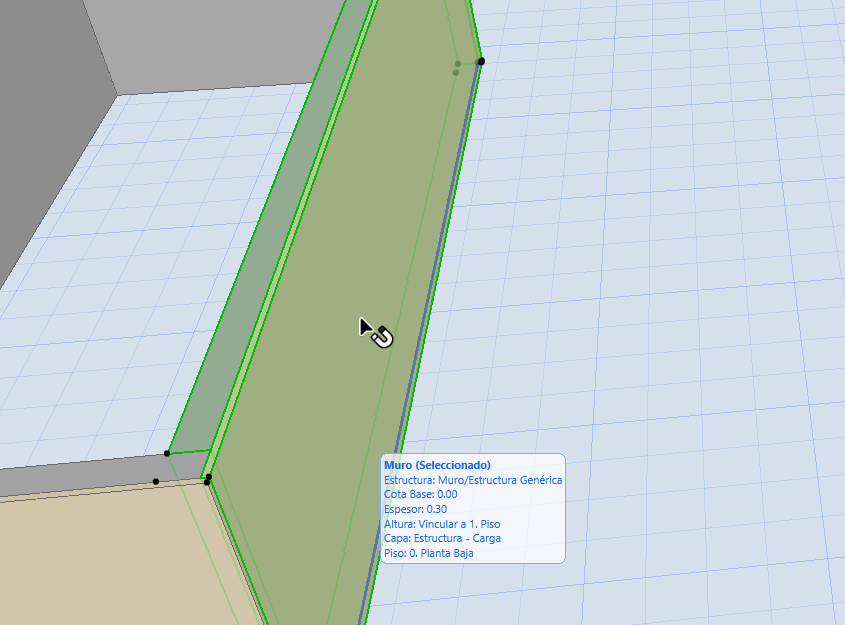
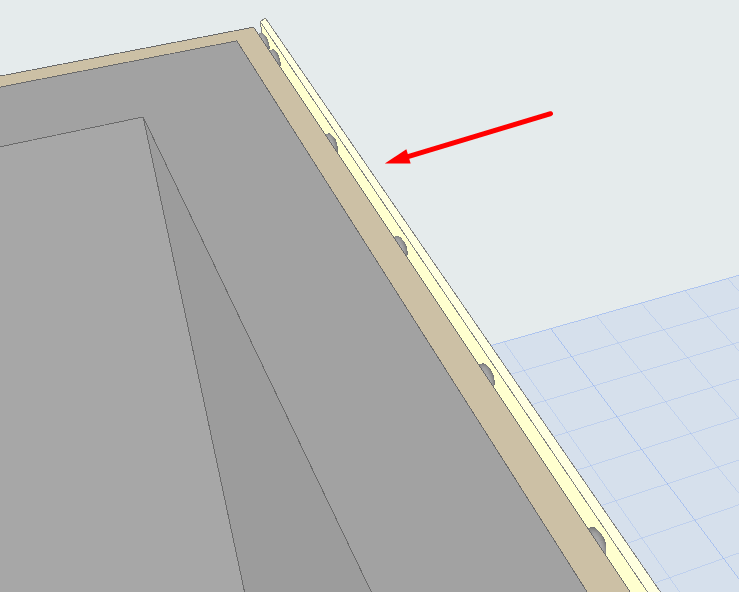
Note: Special objects placed this way remain associated with the wall. If the wall is modified or deleted, the accessory adapts or is deleted automatically.
Step 4 - Placing special objects without associating them with a wall
It is also possible to place special objects independently.
- Access the Accessories command without first selecting a wall.
-
Choose the desired special object.
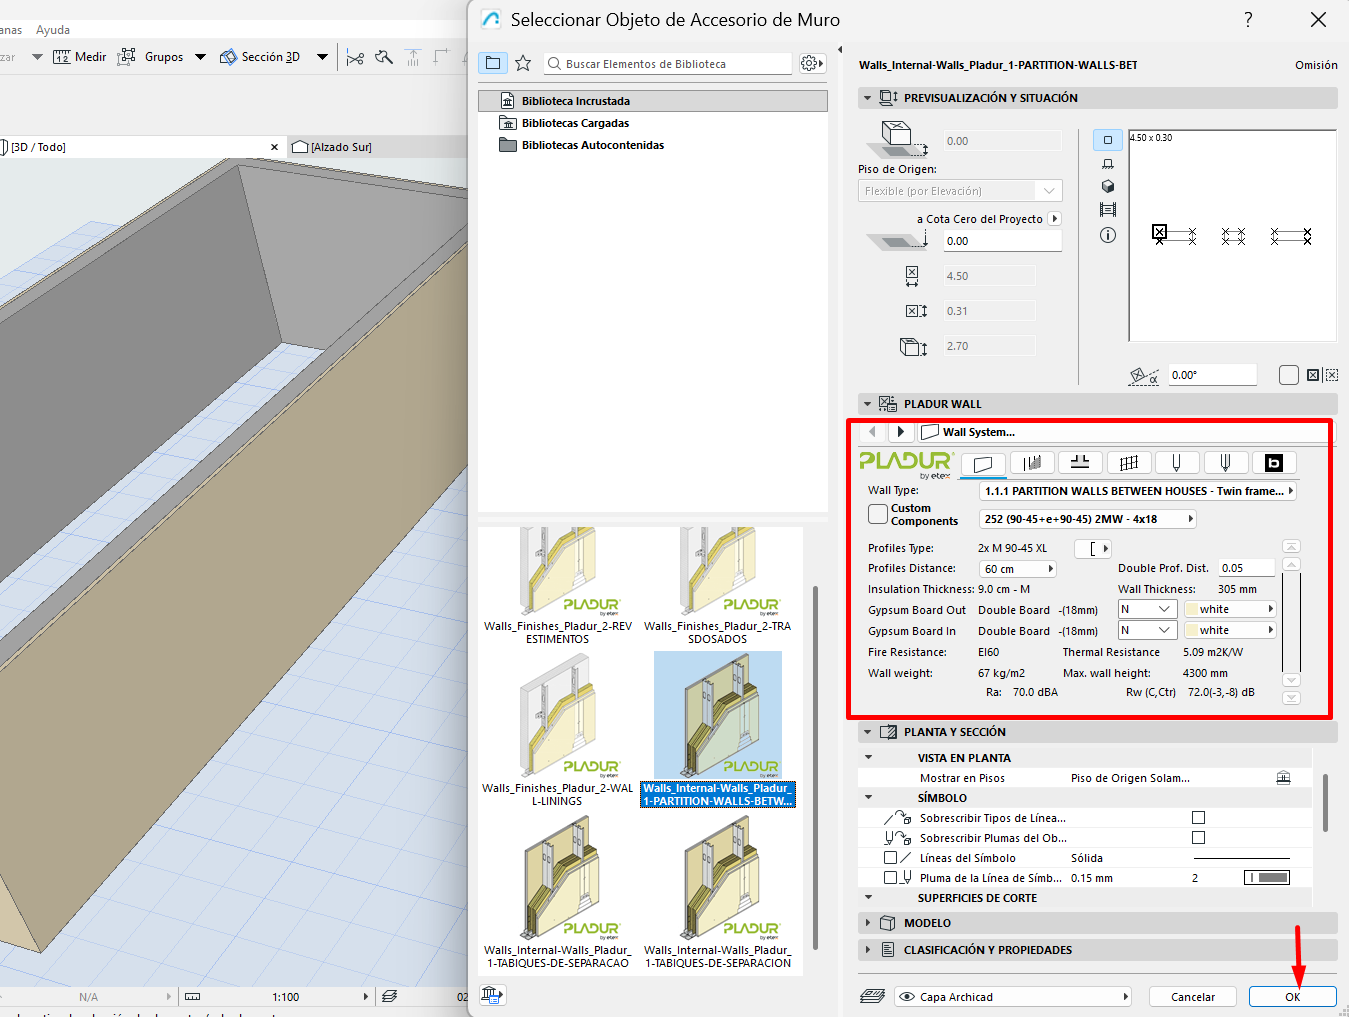
-
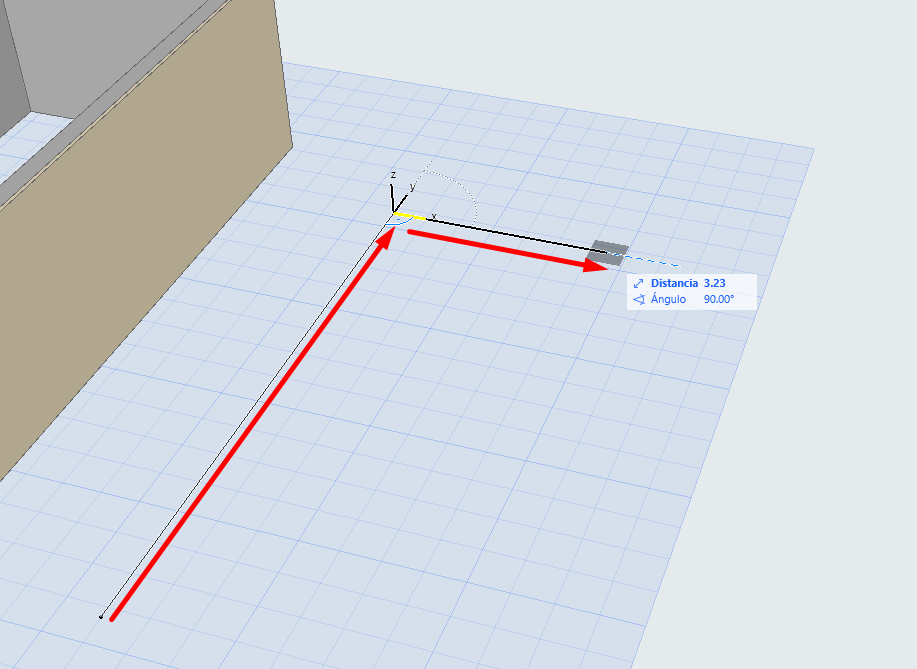
Draw a polyline on the floor plan to define its geometry.
Step 5 - Creating a custom keyboard shortcut
If you use special objects frequently, it is recommended to create a keyboard shortcut for quick access to the command.
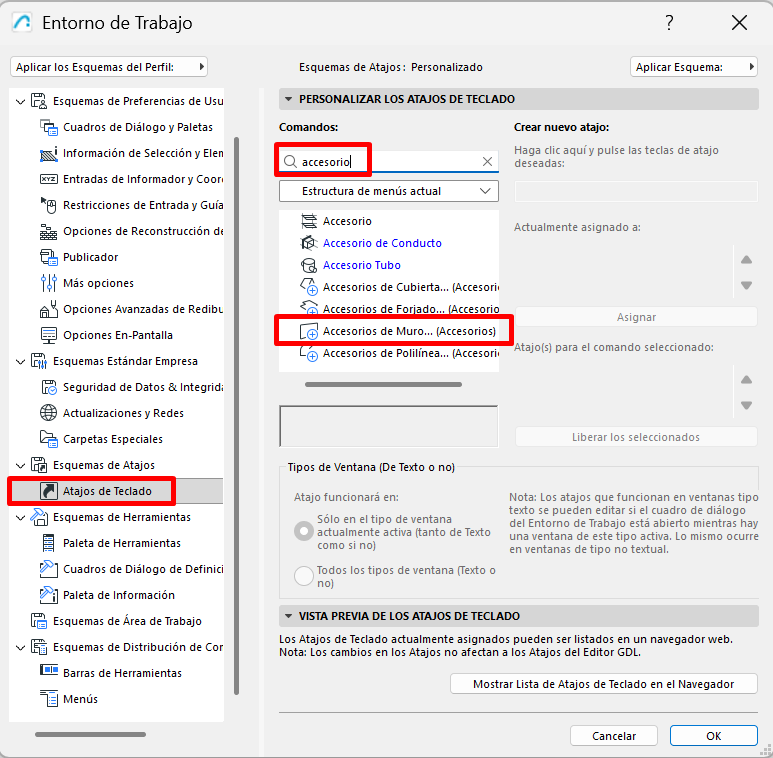
- Go to Options → Work Environment → Keyboard Shortcuts.
-
Find the Wall Accessories command.
-
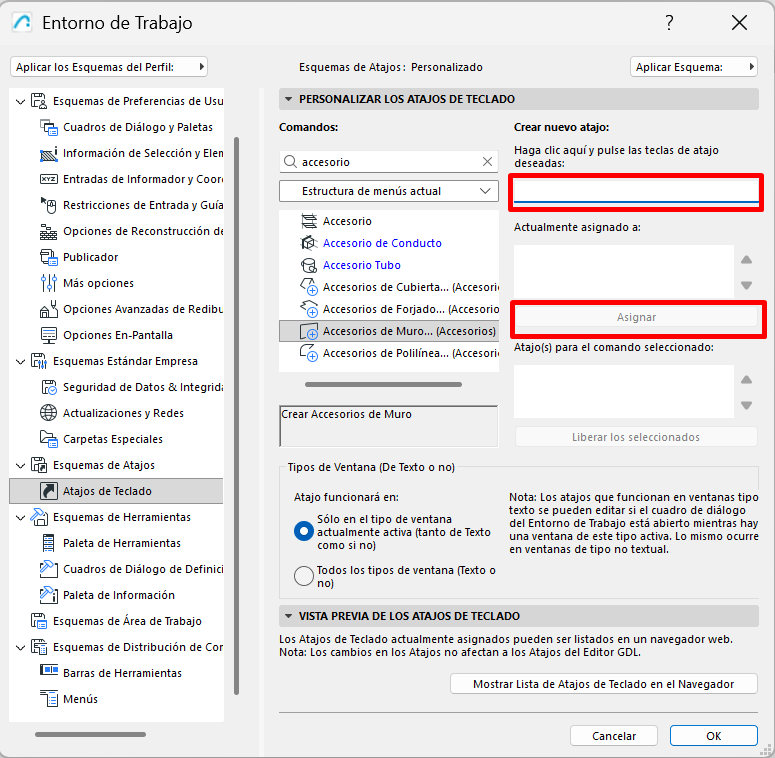
Assign a keyboard shortcut, for example I or Ctrl + I or any other you prefer.
Step 6 - Using Favorites
You can save the special wall objects you use most often as Favorites to speed up your workflow.
- Configure the special object with the desired parameters.
- Save it as a Favorite.
- Access it later from the Favorites palette.
Related articles
- How to Uniquely Identify Hotlink Module Zones in Archicad Schedules?
- How to Set the Origin of a 3D Texture in Archicad?
- Why Do Drawings Exported to PDF in Archicad Generate Very Large Files?
- How to Map a Custom Archicad Property to an IFC Property?
- How to Remove an Archicad Educational Licence from a Computer?