
Articles in this section
- How to Uniquely Identify Hotlink Module Zones in Archicad Schedules?
- How to Set the Origin of a 3D Texture in Archicad?
- Why Do Drawings Exported to PDF in Archicad Generate Very Large Files?
- How to Map a Custom Archicad Property to an IFC Property?
- How to Remove an Archicad Educational Licence from a Computer?
- How to Change an Archicad File Started in the International Version to the Spanish Version?
- How to Import a PDF to Use as a Reference in Archicad?
- How to Use Educational and Commercial Versions of Archicad on the Same Computer?
- How to Get the Archicad Connection with Twinmotion?
- How to Create a Structural Frame with the Create Truss Tool in Archicad?
How to Verify Project Requirement Compliance in Archicad? Space Area Control – Semi-Automated Option
Reading time: 5 min.
An architectural design team is working on an institutional project with precise requirements for the minimum area of different space types: offices, technical rooms, corridors, among others. During development, the reference values can change due to client decisions or updated regulations.
Instead of checking compliance manually, the team decides to implement an automated method in Archicad that allows the required areas to be recorded, calculated dynamically by space type, and compared directly against what has been modelled. This solution provides traceability, flexibility in the face of change, and time savings during reviews.
We also recommend reviewing the following resources before continuing with this article:
Target Audience
Technical teams, BIM modellers, project coordinators, and quality control staff who use Archicad to validate area requirements.
Prerequisites
- Archicad 25 or later
- Project with Zones modelled and correctly classified
- Basic knowledge of custom Properties and Interactive Schedules
Solution Steps
-
Create a new custom Property group:
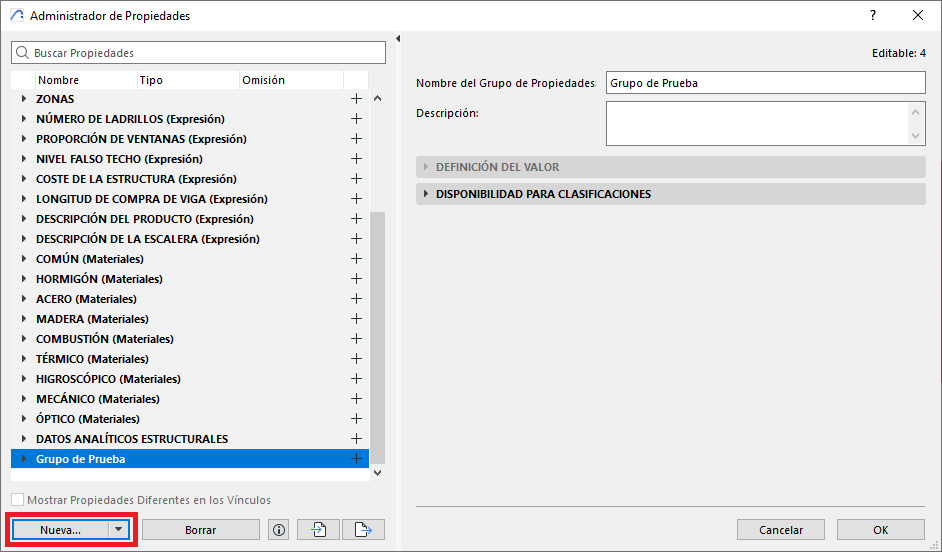
The purpose of the Property Group is to make it easier to manage the project's Properties.- Go to Options > Property Manager.
- In the Property Manager dialog box, click New...
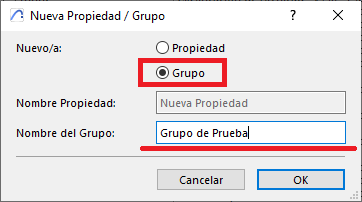
- In the New Property / Group dialog box, select Group, and give it a descriptive name, for example "Test Group"
-
Create properties by space type:
For each space type, create a custom Property reflecting its required area (see example image):- Suggested name: Req_Area_Type_{SpaceName}
- Data type: Area
- Expression:
IF({Zone/Zone Name} = "Space name"; required value in m²; 0 m²)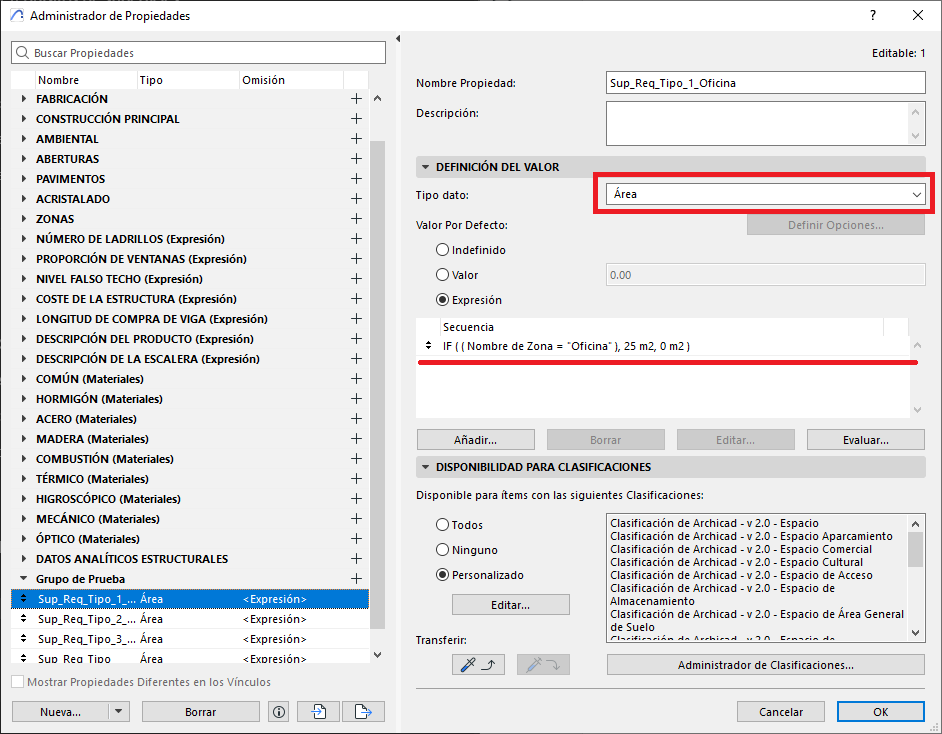
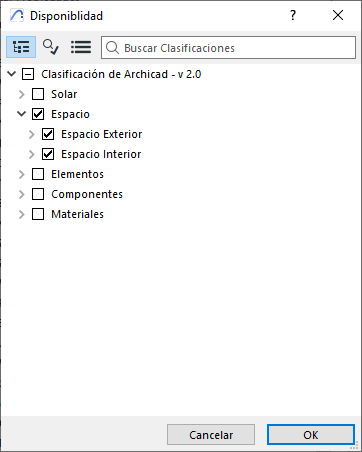
- Under Availability for Classification, select the Custom option, and click "Edit".
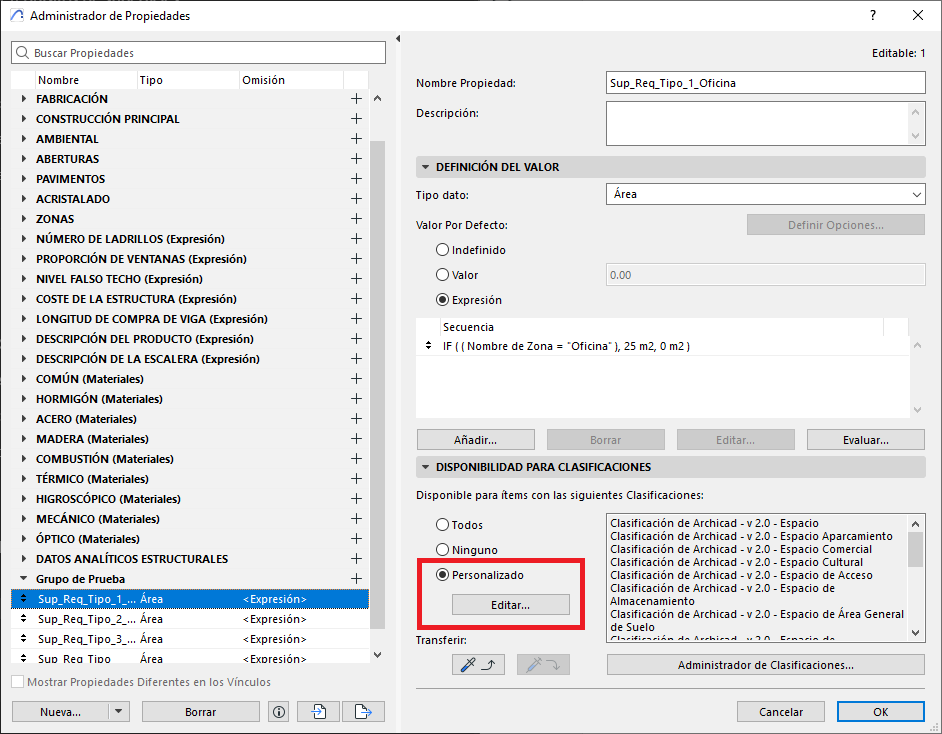
- In the Availability dialog box, select Zone (to make the property available for all zones).
-
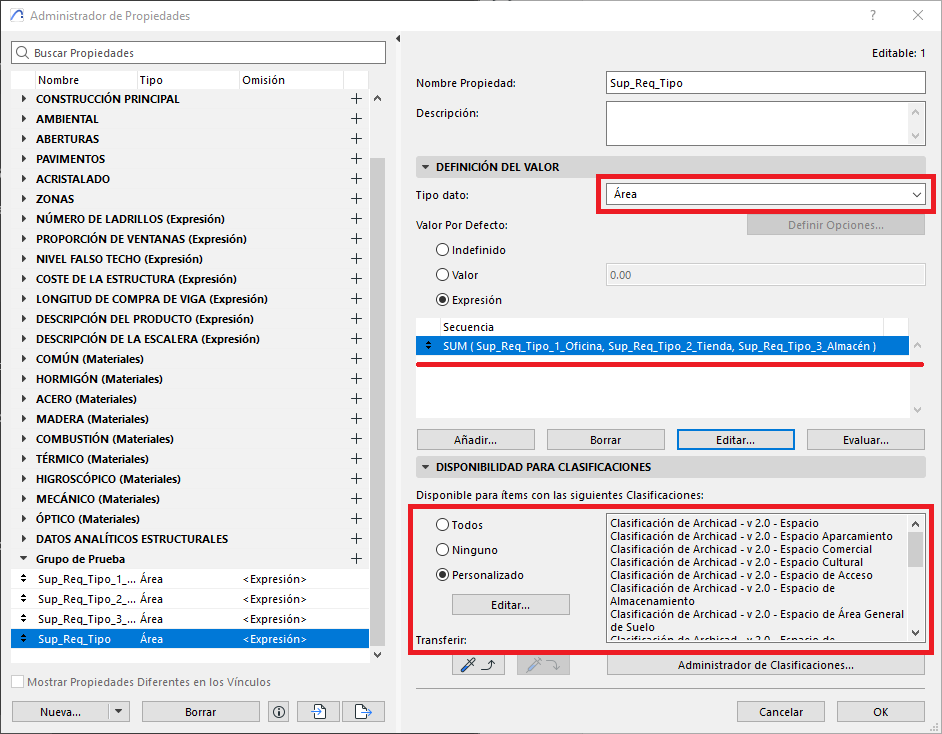
Create the total sum Property:
- Suggested name: Req_Area_Type
- Data type: Area
- Expression:
SUM ( {All the space types just created} ) - Classification: Zone
-
Create an Interactive Schedule:
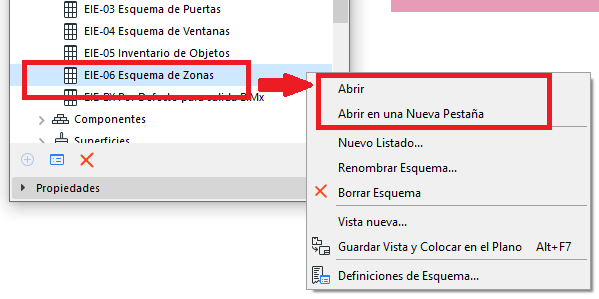
- Open the project's Navigator palette, Window > Palettes > Navigator.
- Right-click the Schedule, and select the Open or Open in New Tab option.
- The Scheme Settings dialog box will open, and we create the scheme with the Element Type "Zone", with the following fields:
- Zone Name
- Measured Area
- Properties
Req_Area_Type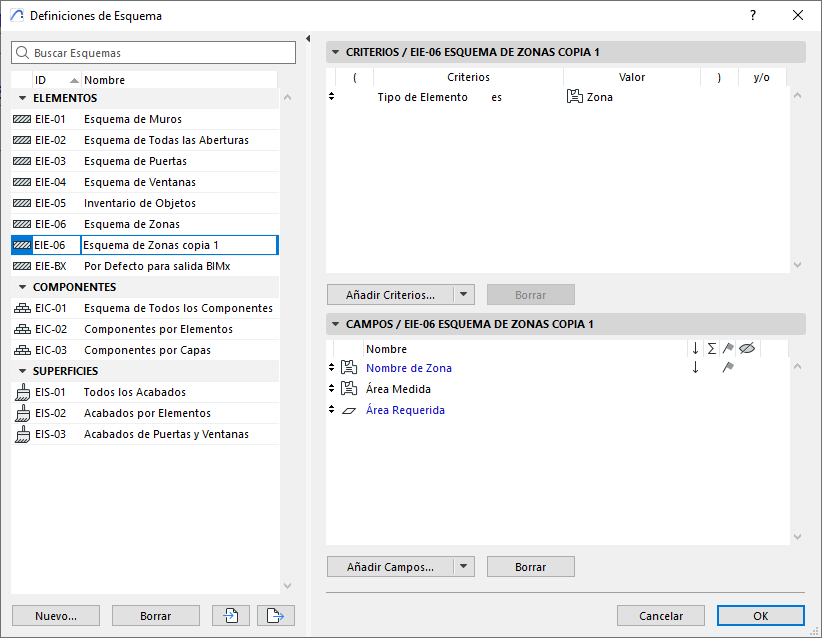
- Save the Schedule by clicking Ok.
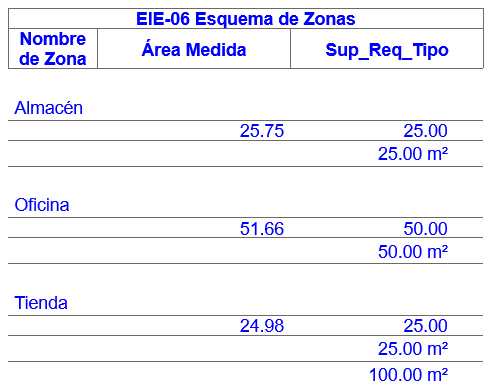
- And you'll see a schedule similar to the following, showing the measured area of the Zones compared against the area required by the project.
-
View and analyse:
Compare the modelled area vs. the required areas
Quickly detect whether requirements are being met or whether there are deviations.
Resolution and Analysis
The team can now adjust requirements centrally by modifying the values of the custom Properties. The Interactive Schedule updates in real time, allowing agile iteration and avoiding errors from manual calculations.
Troubleshooting
- Verify that the zones are correctly bounded by walls or other elements, and that the area calculation method is the appropriate one.
- Verify the correct classification as "Space" on the Zone elements.
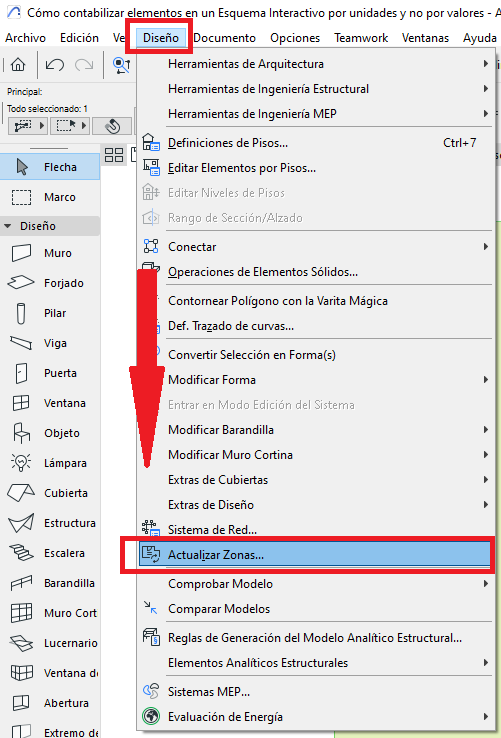
- If the area values do not update, use Design > Update Zones.
Confirm that the zone names defined in the expressions match exactly
Make sure all properties are available for the appropriate element type
Sample file:
You can download a sample project file with a correctly configured Interactive Schedule using a custom property that counts elements by unit:
Consultant's Tip
Keeping a clear, consistent naming structure for properties lets any team member easily understand and edit the values. On large projects, grouping space types or using templates can reduce complexity.
Related articles
- How to Uniquely Identify Hotlink Module Zones in Archicad Schedules?
- How to Set the Origin of a 3D Texture in Archicad?
- Why Do Drawings Exported to PDF in Archicad Generate Very Large Files?
- How to Map a Custom Archicad Property to an IFC Property?
- How to Remove an Archicad Educational Licence from a Computer?