
Articles in this section
- How to Uniquely Identify Hotlink Module Zones in Archicad Schedules?
- How to Set the Origin of a 3D Texture in Archicad?
- Why Do Drawings Exported to PDF in Archicad Generate Very Large Files?
- How to Map a Custom Archicad Property to an IFC Property?
- How to Remove an Archicad Educational Licence from a Computer?
- How to Change an Archicad File Started in the International Version to the Spanish Version?
- How to Import a PDF to Use as a Reference in Archicad?
- How to Use Educational and Commercial Versions of Archicad on the Same Computer?
- How to Get the Archicad Connection with Twinmotion?
- How to Create a Structural Frame with the Create Truss Tool in Archicad?
How to Verify Project Requirement Compliance in Archicad? Space Area Control - Simplified Option
Reading time: 5 min.
A project consultant needs a practical method for verifying that the project’s areas comply with the established requirements, and this article shows how to achieve this using only standard tools included in Archicad.
Audience
Architectural designers, BIM coordinators and consultants who use Archicad to validate space areas against project requirements.
Prerequisites
- Archicad 25 or later
- Basic knowledge of using the Zone tool, the Property Manager, Classifications and Interactive Schedules
Resolution Steps
-
Create a new custom Property group:
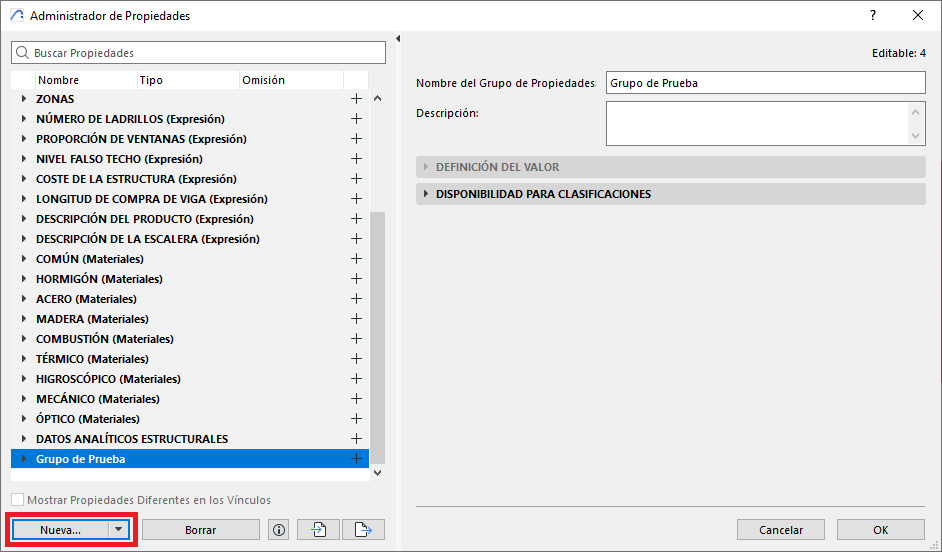
The purpose of the Property Group is to make it easier to manage the project’s Properties.- Go to Options > Property Manager.
- In the Property Manager dialog box, click New...
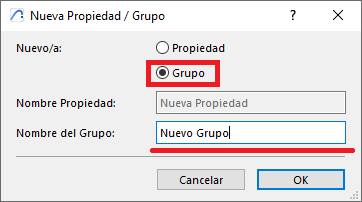
- In the New Property / Group dialog box, select Group, and give it a descriptive name, for example "Test Group”
- Define a Property for the Required Area:
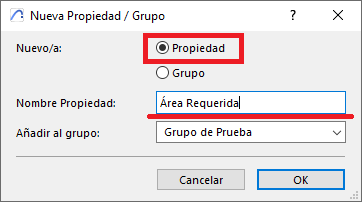
- In the Property Manager dialog box, click New...
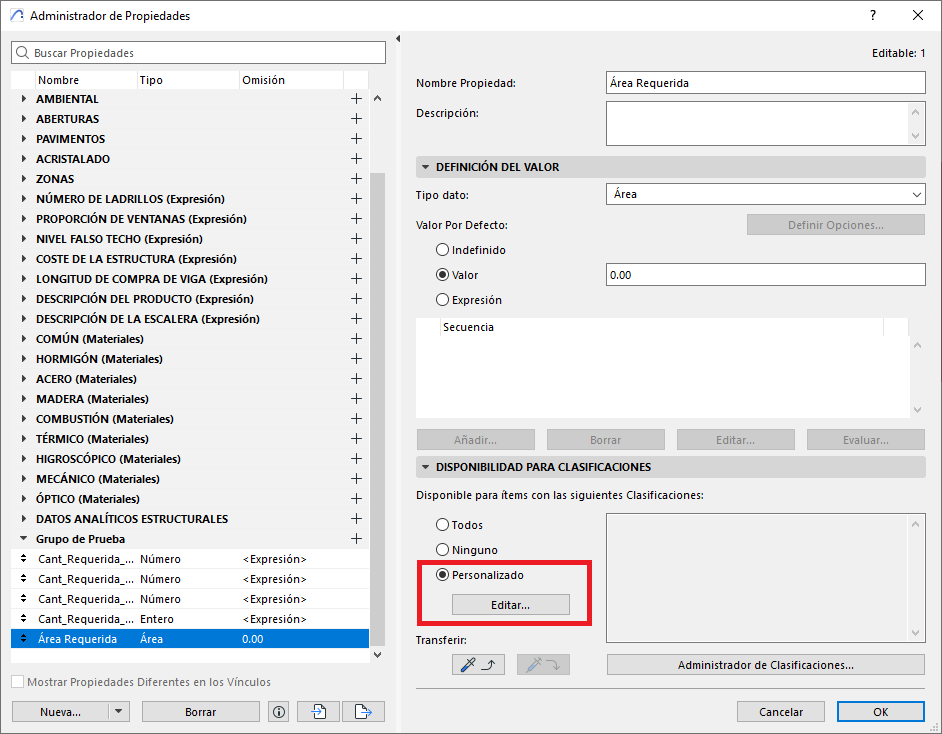
- In the New Property / Group dialog box, select Property, and give it a descriptive name, for example “Required Area”.
- Set the following for that Property:
Data Type: Area
Default Value: Value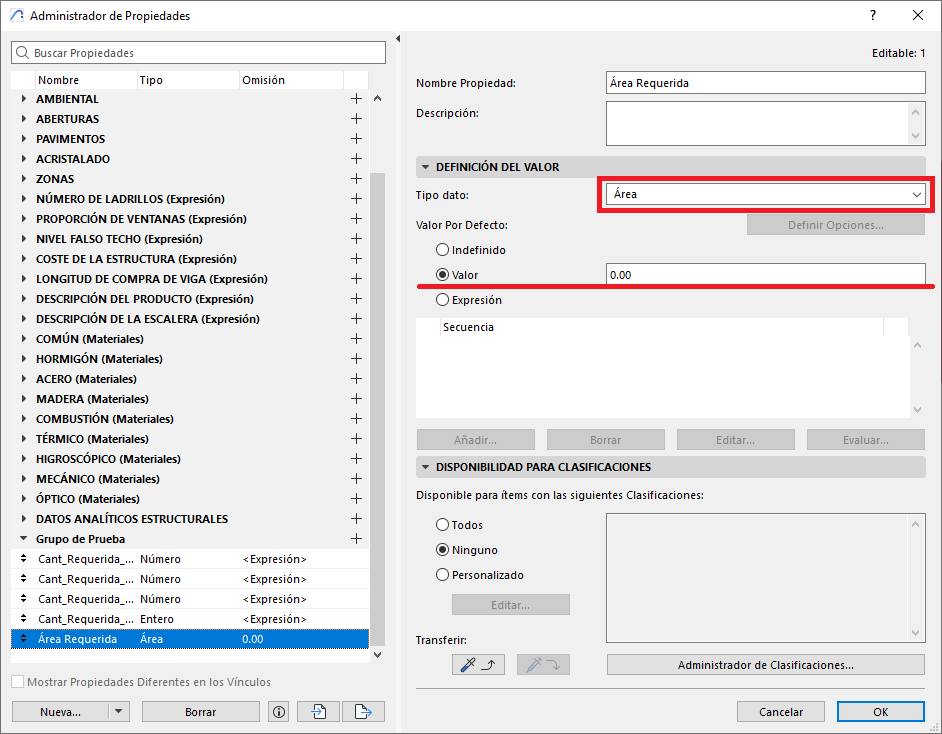
- Under Classification Availability, select the Custom option, and click "Edit".
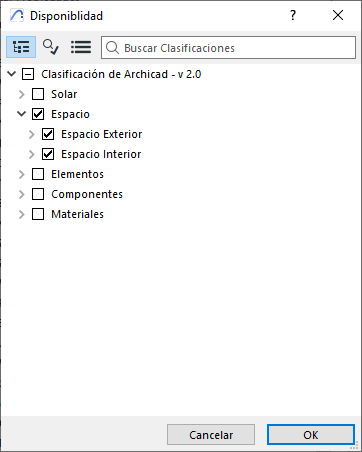
- In the Availability dialog box, select Space (to make the property available for all zones).
-
Model and Assign Reference Zones:
- Use the Zone tool to create sample zones representing the required space types and areas.
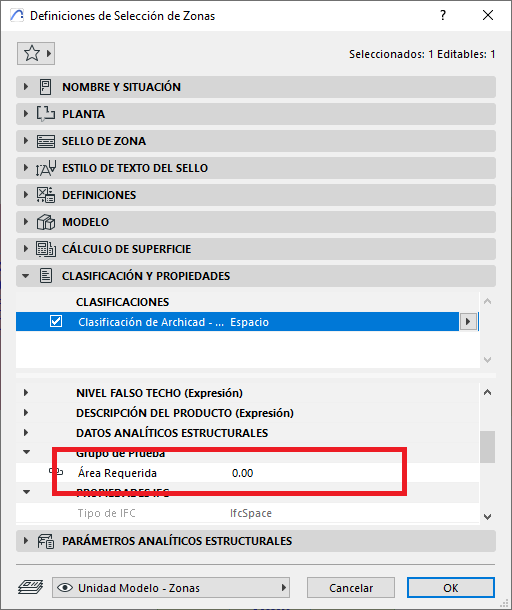
- For each reference Zone, enter the corresponding value in the “Required Area” custom property via the Info Box or the Zone Settings.
- Place All the Project’s Actual Zones: Model all the zones representing the project’s actual layout by copying and pasting the reference Zones.
-
Create an Interactive Schedule:
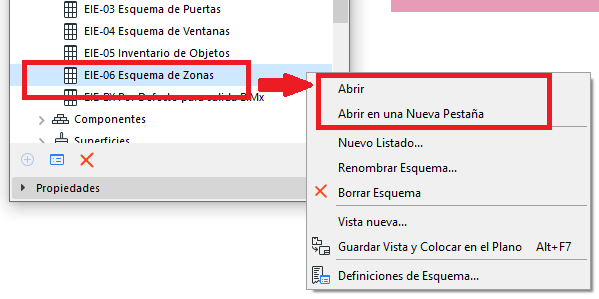
- Open the project’s Navigator palette, Window > Palettes > Navigator.
- Right-click the Schedule, and select the Open or Open in a New Tab option.
- The Scheme Settings dialog box will open, showing the Property you created with the values that need to be edited (see example photo).
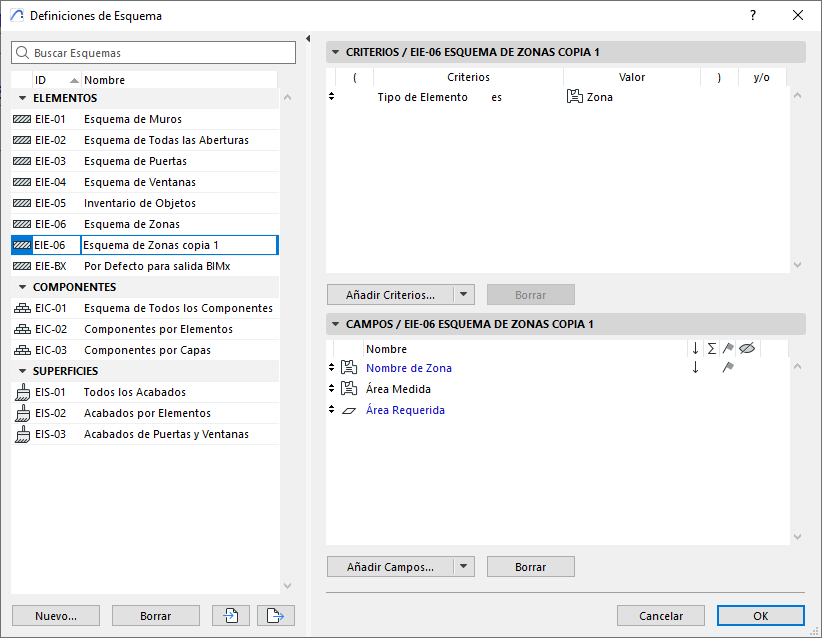
- Save the Schedule by clicking Ok.
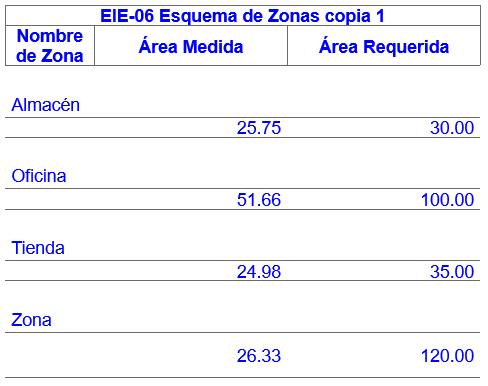
- You will see a schedule generated similar to the following, showing the measured area of the Zones compared with the area required by the project
Troubleshooting
- Verify that the zones are correctly bounded by walls or other elements, and that the area calculation method is appropriate.
- Verify the correct classification as “Space” on the Zone elements.
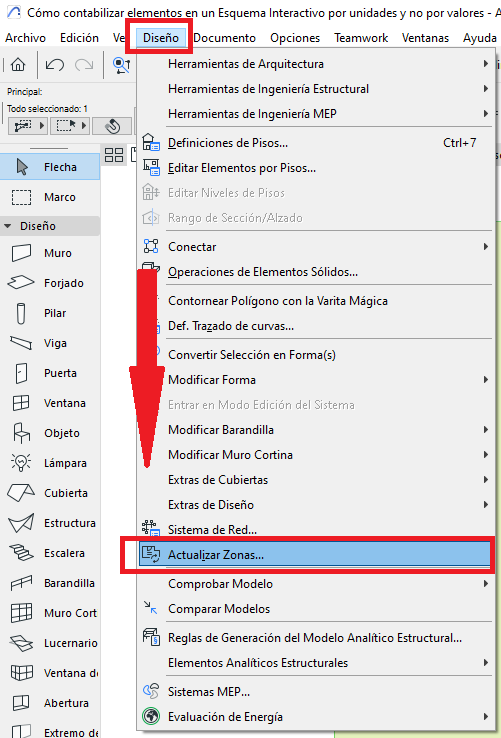
- If the area values do not update, use Design > Update Zones.
Consultant’s Tip
This method has:
- The advantage: simplicity and speed of implementation.
- Disadvantages: Not suitable for larger or more complex projects.
We also recommend reviewing the following resources:
Related articles
- How to Uniquely Identify Hotlink Module Zones in Archicad Schedules?
- How to Set the Origin of a 3D Texture in Archicad?
- Why Do Drawings Exported to PDF in Archicad Generate Very Large Files?
- How to Map a Custom Archicad Property to an IFC Property?
- How to Remove an Archicad Educational Licence from a Computer?